

The most common chicken mistake I see in home kitchens isn’t about seasoning — it’s about time and temperature. Knowing exactly how long to cook chicken legs in the oven is the difference between juicy, deeply browned skin that crackles when you bite it and pale, rubbery meat that disappoints everyone at the table. In my kitchen tests, I’ve dialed in precise times and temperatures for every oven method, and I’m sharing the full breakdown here — including the meat science that explains why the numbers matter.
Chicken legs are one of the most forgiving cuts on the bird. Their higher fat content and collagen-rich connective tissue mean they stay moist even when pushed slightly past the minimum safe temperature. Understanding the baking time for chicken legs at different temperatures lets you control everything from crispy skin to fall-off-the-bone tenderness with confidence.
Why You’ll Love This Method
Chicken legs — the drumstick and thigh together — are the most flavor-dense part of the bird. Their fat content is significantly higher than breast meat, which means two things: they’re far more forgiving of slight overcooking, and they develop richer, more complex flavor during roasting because fat carries and amplifies fat-soluble aromatic compounds.
The Maillard reaction is the reason oven-roasted chicken legs develop that crackling, mahogany-brown skin. This non-enzymatic browning begins when skin surface temperature exceeds 280°F (138°C) — the moment amino acids and residual sugars in the skin begin forming hundreds of new flavor molecules. Moisture on the skin surface delays this reaction, which is exactly why patting the skin completely dry before seasoning is non-negotiable.
I’ve found that 425°F (220°C) is the sweet spot for home ovens — hot enough to trigger aggressive Maillard browning on the skin within the first 15 minutes, while the higher fat and collagen content of the leg keeps the interior moist through the full cook. This guide gives you every time and temperature you need, with the science to back each one.
The Butcher’s Selection – Ingredients & Seasoning
The quality of the chicken leg determines the ceiling of this recipe. Air-chilled chicken legs have significantly drier skin than water-chilled versions — that dryness means faster, more even Maillard browning in the oven. Look for legs with intact skin and no tears, as skin gaps allow moisture to escape from the meat beneath during cooking.
- 4 whole chicken legs (drumstick + thigh, approx. 350–400g each)
- 2 tablespoons neutral oil or melted butter
- 1½ teaspoons kosher salt
- 1 teaspoon freshly cracked black pepper
- 1 teaspoon smoked paprika
- ½ teaspoon garlic powder
- ½ teaspoon onion powder
- ¼ teaspoon cayenne pepper (optional)
- Optional: fresh thyme or rosemary tucked under the skin
How Long to Cook Chicken Legs in the Oven – Step by Step
The most reliable answer to baking time for chicken legs depends on two variables: oven temperature and leg size. Here’s the complete time reference before we get into technique:
| Oven Temp | Cook Time | Result |
|---|---|---|
| 350°F / 175°C | 50–55 minutes | Juicy, tender — less crispy skin |
| 375°F / 190°C | 45–50 minutes | Good balance of moisture and color |
| 400°F / 205°C | 40–45 minutes | Crispy skin, fully rendered fat |
| 425°F / 220°C | 35–40 minutes | Best: crackling skin, juicy interior |
Free printable
Get every time and temperature on one sheet
The 3-page Meat Temp & Timing Cheat Sheet: internal temperatures, cook times for 30 cuts, resting and storage. Print it once, stop searching.
You’ll also get occasional recipes by email. Unsubscribe anytime. Privacy policy.
Almost there: check your inbox.
Click the confirmation link and the PDF downloads right away.
Safe internal temperature for all chicken is 165°F / 74°C at the thickest part of the thigh, away from the bone. For chicken legs specifically, I prefer pulling them at 175–185°F / 79–85°C — the collagen in the connective tissue fully converts at this range, producing the yielding, juicy texture that makes chicken legs worth eating. The external link from Easy Clean Cook on chicken leg oven times offers a useful supplementary temperature breakdown for different leg weights.
- Pull the chicken legs from the refrigerator 20–30 minutes before cooking. Cold meat placed directly into a hot oven cooks unevenly — the exterior overcooks while the interior struggles to reach temperature. Tempering reduces this gradient and produces more consistent results throughout.
- Preheat your oven to 425°F (220°C). Place a wire rack inside a rimmed baking sheet. The rack elevates the legs so hot air circulates underneath, crisping the underside of the skin rather than steaming it against a flat pan surface.
- Pat the skin completely dry with paper towels. This is the most impactful single step for crispy skin. Surface moisture must evaporate before skin temperature can rise above 212°F (100°C) — the boiling point of water — where Maillard browning begins. Any remaining moisture significantly delays the reaction.
- Coat with oil or melted butter and apply the seasoning rub. Oil ensures even fat coverage across the skin surface and acts as a thermal conductor, helping the skin reach browning temperatures faster and more uniformly. Work the seasoning into the skin and under the skin flap where possible.
- Roast for 35–40 minutes at 425°F (220°C). Don’t open the oven during the first 25 minutes — each opening drops oven temperature by 25–50°F (14–28°C) and resets the Maillard browning progress on the skin surface.
- Check internal temperature at 35 minutes. Insert a meat thermometer into the thickest part of the thigh, angled away from the bone. Bone conducts heat differently than muscle tissue and gives a false reading if contacted. Target 175–185°F / 79–85°C for optimal texture.
- Rest for 5 minutes before serving. Muscle fibers tighten under heat and expel moisture toward the center of the meat. Resting allows those fibers to relax and reabsorb the juices — cutting immediately wastes the moisture that just redistributed. Five minutes is all it takes for chicken legs.

- 1-second instant read – know immediately when chicken hits the safe 165°F
- Auto-rotating backlit screen – easy to read from any angle, even in low light
- Ultra-accurate probe (±0.9°F) – prevents dry or undercooked chicken

- Elevated airflow design – cooks chicken evenly on all sides
- Heavy-duty stainless steel – oven safe up to 575°F with no rust
- Dishwasher safe – effortless cleanup after roasting
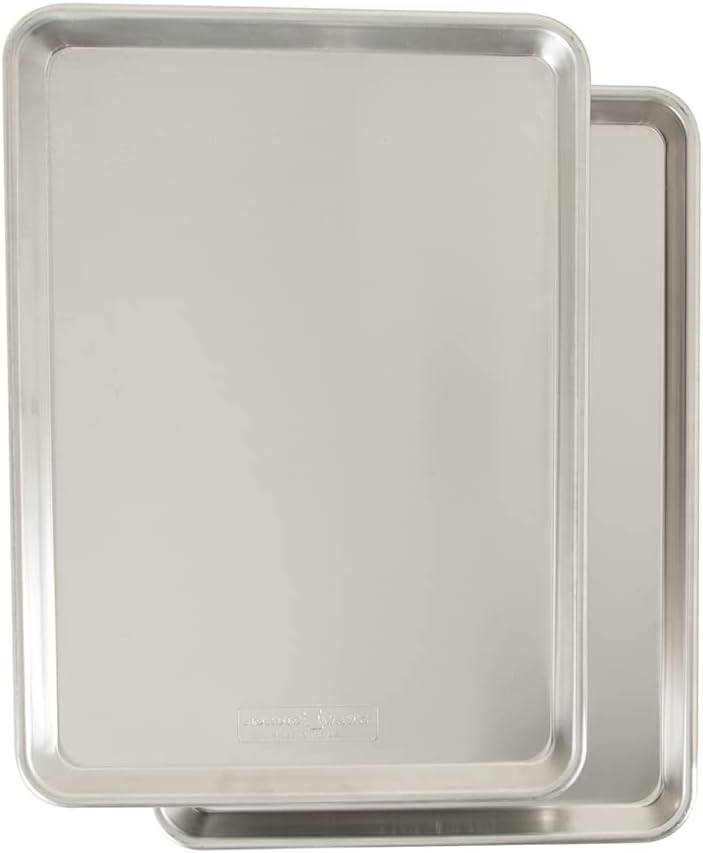
- Pure aluminum construction – distributes heat evenly for better cooking
- Warp-resistant reinforced rim – stays flat even at high temperatures
- Commercial-grade durability – built to last for years of roasting

- Extra-large dial display – instantly see the exact oven heat
- Highly accurate readings – prevents undercooking or overbaking
- Durable stainless steel design – hangs or stands inside your oven
Pro Cooking Tips – Heat Management & Equipment
Always use a wire rack over a baking sheet. Direct pan contact traps steam released from the bottom skin, preventing it from crisping. A rack allows 360° air circulation and produces uniformly browned skin on all sides — a night-and-day difference versus a flat sheet pan alone.
Score the skin with a sharp knife before seasoning. Two or three shallow diagonal cuts through the skin down to the flesh allow fat to render out more efficiently during cooking, preventing the skin from ballooning and separating from the meat. It also allows the seasoning to penetrate closer to the muscle.
Finish with a 2-minute broil for competition-level skin. In the final 2 minutes, switch to the broiler on high. Keep the rack in the upper-middle position and watch continuously — the skin can go from perfectly golden to burnt in under 60 seconds under a broiler. This step is optional but produces the kind of crackling, lacquered skin you’d expect from a restaurant.
Use a reliable instant-read thermometer every time. Visual cues like clear-running juices are unreliable for food safety. A thermometer reading of 165°F / 74°C minimum in the thickest muscle tissue is the only verification that matters.
Recipe Variations
🥄 Slow Cooker Version
Season the legs and sear them skin-side down in a hot skillet for 3–4 minutes to develop Maillard browning before transferring to the slow cooker. Cook on LOW for 4–5 hours or HIGH for 2.5–3 hours until internal temperature reaches 175°F/ 79°C. The skin will be soft, not crispy — finish under the broiler for 3 minutes to restore texture.
⚡ Instant Pot Version
Pressure cook on HIGH for 15 minutes with ½ cup of chicken stock in the pot, then natural release for 5 minutes. The legs emerge fall-off-the-bone tender but with soft skin. Brush with oil and seasoning, then broil on a rack for 5–6 minutes to develop the crackling, browned exterior the oven method delivers naturally.
🥩 Keto / Low-Carb Version
Replace smoked paprika and any sweet rubs with a blend of garlic powder, onion powder, dried oregano, and cayenne. Use avocado oil for its high smoke point (520°F / 271°C) — it handles 425°F oven heat without oxidizing. Chicken legs are naturally keto-friendly; the skin’s fat content is the asset, not a concern.
🌿 Herb-Butter Under the Skin
Mix 2 tablespoons of softened butter with fresh thyme, rosemary, minced garlic, and lemon zest. Carefully separate the skin from the meat without tearing it, then press the butter mixture directly onto the flesh. The butter melts during roasting, continuously basting the muscle tissue from within for an exceptionally juicy, aromatic result. For a lighter protein option alongside, tofu chicken fingers make an excellent plant-based pairing on the same platter.
What to Serve With Oven Chicken Legs
Oven-roasted chicken legs work with nearly every side in a home cook’s repertoire. The richness of dark meat calls for something that cuts through or absorbs the savory fat — here are the pairings that consistently earn second helpings:
- 🥔 Roasted garlic mashed potatoes
- 🥗 Simple green salad with vinaigrette
- 🥕 Honey-glazed roasted carrots
- 🍚 Steamed jasmine or basmati rice
- 🥦 Roasted broccoli or broccolini
- 🍞 Crusty bread for pan drippings
- 🫘 Creamy white beans with garlic
- 🥗 Cucumber and tomato salad
Storage & Meal Prep
Store cooled chicken legs in an airtight container for up to 4 days. The skin softens when refrigerated — reheat on a wire rack in a 400°F (205°C) oven for 10–12 minutes to restore crispiness. Microwaving produces steam that ruins the skin texture permanently.
Wrap individual legs in plastic wrap, then store in a freezer bag for up to 3 months. Thaw overnight in the refrigerator — never at room temperature, which allows the exterior to enter the bacterial growth danger zone (40–140°F / 4–60°C) while the interior is still frozen.
The best reheat method: place on a wire rack over a baking sheet in a 400°F (205°C) oven for 10–15 minutes. The dry circulating heat re-crisps the skin and brings the interior back to a safe serving temperature without drying out the meat. A light brush of oil before reheating helps restore the original skin texture.
Cook a double batch and refrigerate whole legs for up to 4 days. Pull the meat off the bone and store shredded for use in tacos, grain bowls, soups, or sandwiches throughout the week. Dark meat holds its moisture after shredding far better than breast meat does — it’s the superior meal prep protein.
Nutritional Information
Per serving (one whole chicken leg, approx. 350g, skin-on, roasted with oil and seasoning rub):
| Nutrient | Per Serving | % Daily Value* |
|---|---|---|
| Calories | 320 kcal | — |
| Total Fat | 21g | 27% |
| Saturated Fat | 6g | 30% |
| Cholesterol | 145mg | 48% |
| Sodium | 480mg | 21% |
| Total Carbohydrates | 1g | 0% |
| Protein | 32g | 64% |
*Percent Daily Values based on a 2,000 calorie diet. Values are estimates and vary based on chicken leg size and specific seasoning used.
Common Mistakes to Avoid
Surface moisture on the skin must fully evaporate before skin temperature can exceed 212°F (100°C) — the point where Maillard browning begins. Wet skin steams instead of browning, producing pale, rubbery skin regardless of oven temperature. Pat thoroughly with paper towels and, ideally, dry-brine uncovered overnight.
The underside of the chicken leg rests in its own rendered fat and released moisture when cooked flat on a sheet pan. This steams the bottom skin rather than crisping it. A wire rack elevates the legs so air circulates underneath — the result is uniformly crispy skin on all sides, not just the top.
165°F (74°C) is the USDA minimum safe temperature for poultry — it guarantees food safety but not optimal texture in dark meat. Chicken leg connective tissue and collagen don’t fully convert until 175–185°F (79–85°C). Pulling at 165°F (74°C) often leaves the meat around the joint slightly rubbery. Dark meat genuinely improves beyond the minimum safe temperature.
Every time you open the oven, the temperature drops 25–50°F (14–28°C) and takes several minutes to recover. During this recovery window, the skin surface cools below the Maillard threshold and browning stalls. Set a timer for 35 minutes and resist opening until then — trust the temperature rather than visual checks.
Cutting into chicken legs immediately after pulling them from the oven releases the juices that redistributed toward the center during the cook. A 5-minute rest allows muscle fibers to relax and reabsorb that moisture. The difference in juiciness between a rested and an immediately-cut chicken leg is measurable and visible on the cutting board.
FAQs
Crispy Skin Awaits — Save This Guide.
Pin this complete chicken leg oven timing guide to your dinner boards and never second-guess the clock again — perfectly juicy, crackling-skinned chicken legs every single time.
Save to Pinterest
How Long to Cook Chicken Legs in the Oven – Complete Guide
A guide to cooking chicken legs in the oven, focusing on time and temperature for optimal results – juicy meat and crispy skin. Includes meat science explanations and variations.
- 4 whole chicken legs (drumstick + thigh, approx. 350–400g each)
- 2 tablespoons neutral oil or melted butter
- 1½ teaspoons kosher salt
- 1 teaspoon freshly cracked black pepper
- 1 teaspoon smoked paprika
- ½ teaspoon garlic powder
- ½ teaspoon onion powder
- ¼ teaspoon cayenne pepper (optional)
- fresh thyme or rosemary tucked under the skin
Roasting Chicken Legs
Pull the chicken legs from the refrigerator 20–30 minutes before cooking.
Preheat your oven to 425°F (220°C). Place a wire rack inside a rimmed baking sheet.
Pat the skin completely dry with paper towels.
Coat with oil or melted butter and apply the seasoning rub. Work the seasoning into the skin and under the skin flap where possible.
Roast for 35–40 minutes at 425°F (220°C). Don't open the oven during the first 25 minutes.
Check internal temperature at 35 minutes. Insert a meat thermometer into the thickest part of the thigh, angled away from the bone. Target 175–185°F (79–85°C).
Rest for 5 minutes before serving.
- Wire rack
- Rimmed baking sheet
- Meat thermometer
Dry brining overnight yields the crispiest skin. Use a wire rack for even cooking and crispy skin. Target an internal temperature of 175-185°F (79-85°C) for optimal texture.
Did You Try Our Recipe ?
Scrumptious
My husband (who is extremely picky) loved the liver & onions so much!! I didn’t have any beef broth or Sherry so I used about a tbl of Worcestershire and 1/4 c of white wine …..it was scrumptious
Response from MeatRecipesBox
Oh wow, I’m so happy to hear that!! 😍 I love that you made it work with what you had on hand — Worcestershire and white wine sound like a delicious twist. So glad your husband enjoyed it, especially being picky! Thank you for sharing your version, it makes me smile knowing it turned out scrumptious!
This was amazing
This recipe turned out really amazing! It’s juicy and spiced deliciously. I definitely would use less of the spicy pepper next time, but it really was delicious and I don’t think I’ll make chicken legs any other way from now on.!
Response from MeatRecipesBox
Thank you for taking the time to leave such a thoughtful review. I’m really glad to hear the recipe turned out juicy and full of flavor for you. That’s exactly what I was hoping for when putting it together. Good call on the spicy pepper as well. Adjusting the heat level to your own taste is always the best approach, and using a little less next time should make it just right for you. I really appreciate you trying the recipe and sharing your experience. It’s great to know it worked so well for you.
I Didn’t Expect This Cornbeef Hash Recipe to Taste This Good!!
One skillet. A handful of simple ingredients. Thirty minutes on the clock. And somehow… I ended up with the crispiest, most comforting cornbeef hash recipe I’ve made in years.
I wasn’t expecting much—just a quick, no-fuss meal. But that first bite? Crispy edges, tender potatoes, smoky corned beef, a little kick of pepper. It tasted like something straight off a cozy diner griddle.
Honestly, it caught me off guard—in the best way. Here’s why this simple skillet completely won me over.


