
Sweet and sour chicken is the takeout dish that keeps getting ordered because it is hard to nail at home. The chicken turns soggy, the sauce goes flat, and the whole plate loses that glossy pop you remember. This 30-minute version fixes both problems with a double-cornstarch coat and a 2:1 sugar-to-vinegar sauce, no deep-fryer needed. You get crackly chicken, bright pineapple, and a sauce that clings without turning gluey.
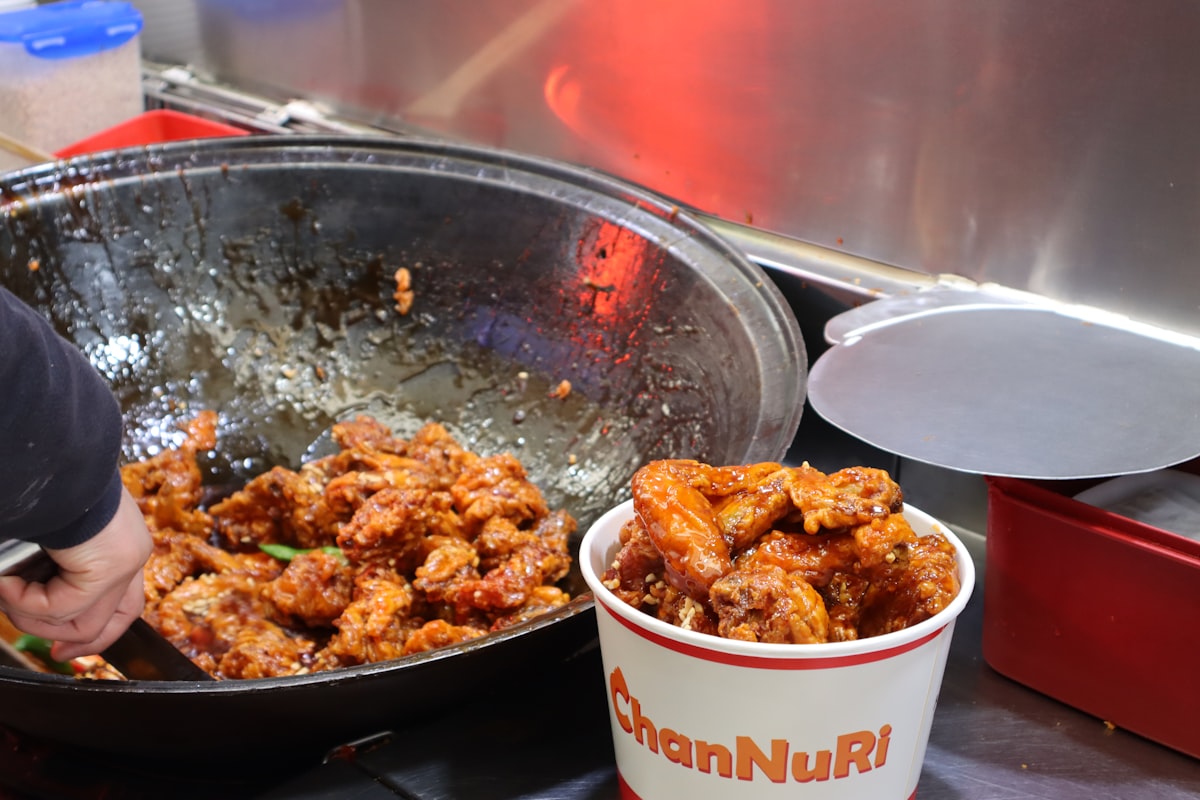
Sweet and sour chicken stays crispy at home when you coat bite-sized chicken thigh in cornstarch twice, shallow-fry at 350°F / 175°C for 4 to 5 minutes, then toss with the sauce only right before serving. The signature sauce is a 2:1 ratio of sugar to rice vinegar, tightened with ketchup and a cornstarch slurry.
Jump to a section
Ingredients You Need
Nothing here is specialty. The whole ingredient list runs on pantry staples plus a fresh pepper and a can of pineapple chunks.
Chicken
- 1.5 lb / 680 g boneless skinless chicken thighs, cut into 1-inch cubes
- 1 tsp fine salt
- 1/2 tsp white pepper
- 1 large egg, beaten
- 3/4 cup cornstarch, divided
- 1/2 cup neutral oil for shallow-frying
Sauce
- 1/2 cup rice vinegar
- 1/2 cup light brown sugar
- 1/3 cup ketchup
- 3 tbsp pineapple juice from the can
- 1 tbsp soy sauce
- 1 tbsp cornstarch mixed with 2 tbsp cold water
Stir-fry add-ins
- 1 red bell pepper, cut into 1-inch pieces
- 1 green bell pepper, cut into 1-inch pieces
- 1 cup pineapple chunks, drained
- 2 garlic cloves, minced
- 1 tsp fresh ginger, minced
- 2 green onions, sliced, for finish
How to Make Sweet and Sour Chicken
Read through the steps before you start. Once the oil is hot, the timing runs fast, and having the sauce whisked and the vegetables prepped is what separates a clean cook from a scramble.
- Season and coat the chicken.Toss the cubed chicken with salt and white pepper, then with 1/4 cup of the cornstarch until every piece looks dusty. Add the beaten egg, mix, then toss with the remaining 1/2 cup cornstarch. This double coat is the crispy backbone.
- Whisk the sauce.In a bowl, combine rice vinegar, brown sugar, ketchup, pineapple juice, and soy sauce until the sugar dissolves. Set the cornstarch slurry beside the stove for later.
- Shallow-fry the chicken.Heat the oil in a wide skillet or wok to 350°F / 175°C. Fry in two batches, 4 to 5 minutes per batch, turning once, until deeply golden and reading 165°F / 74°C in the center. Rest on a rack, not paper towels.
- Cook the vegetables.Pour off all but 1 tbsp oil. Add the peppers and stir-fry for 90 seconds over high heat, then add garlic, ginger, and pineapple for another 30 seconds. The peppers should still snap.
- Glaze off the heat.Pour the whisked sauce into the pan, bring to a simmer, then stir in the slurry. When the sauce turns glossy and coats a spoon, kill the heat, add the fried chicken, and toss twice. Serve immediately with green onions and steamed rice.
Best Chicken Cut: Thigh or Breast
Boneless skinless chicken thigh is the right call for this dish. The extra intramuscular fat holds moisture during the quick high-heat fry, so the interior stays juicy even if a batch runs 30 seconds long. Breast dries out fast at 350°F / 175°C and turns cottony against a sweet sauce.
If breast is what you have, cut the cubes slightly smaller, about 3/4 inch, and drop the fry time to 3 minutes. Pull them right at 160°F / 71°C since carryover heat will finish them on the rack.
How the Chicken Stays Crispy Under the Sauce
Three things keep the coating from turning soft. First is the double cornstarch coat, dusty then eggy then dusty again, which builds a thicker starch shell than a single dredge. Second is temperature control: oil below 340°F / 171°C makes the coating absorb oil and go greasy, while over 365°F / 185°C burns it before the inside cooks.
Third is sauce timing. The sauce should touch the chicken for well under a minute before serving. Toss twice, plate, and eat. Any longer and the shell begins to hydrate.
The Sauce Ratio That Actually Works
The classic Cantonese balance is roughly 2 parts sugar to 1 part vinegar, with ketchup adding body, color, and its own hidden sugar. Miss that ratio and the sauce either puckers your mouth or reads like cough syrup. Below is the working balance for a family-size portion.
| Component | Volume | Role |
|---|---|---|
| Brown sugar | 1/2 cup | Primary sweetness, caramel depth |
| Rice vinegar | 1/2 cup | Bright acidity, mild not harsh |
| Ketchup | 1/3 cup | Color, body, extra sweetness |
| Pineapple juice | 3 tbsp | Fruity round-off, natural enzymes |
| Soy sauce | 1 tbsp | Salt, savoriness |
| Cornstarch slurry | 1 tbsp + 2 tbsp water | Glossy coating power |
Rice vinegar is worth seeking out. Distilled white vinegar works in a pinch but drags the sauce harsh, and apple cider vinegar tips it too fruity. If the finished sauce reads too sharp, add another tablespoon of brown sugar; too flat, add half a tablespoon of vinegar.
What to Serve With Sweet and Sour Chicken
Steamed jasmine or long-grain white rice is the standard because the neutral starch offsets the sweet-tart glaze. A quick smashed cucumber salad with rice vinegar and sesame oil gives you cold crunch against the hot chicken. Vegetable fried rice or a plate of homemade egg fried rice both work if you want a bigger meal.
For a fully takeout-style plate, add wonton soup or hot and sour soup as a starter and a side of steamed dumplings. Skip the noodles: their soft texture doubles down on the sauce and blunts the contrast.
Storage and Reheating
The chicken and sauce store best separately because tossed leftovers turn soft overnight. If you already tossed them, the reheating trick is dry heat, not the microwave.
Mistakes That Ruin the Batch
Three Easy Variations
Baked, less oil
Coat the chicken as written, spray generously with oil, and bake at 425°F / 220°C on a rack for 18 minutes, flipping once.
Air fryer
Air-fry the coated chicken at 380°F / 195°C for 12 minutes, shaking twice. Toss with hot sauce off the heat.
Spicy version
Add 1 tsp Sichuan chili crisp to the sauce and 2 dried red chilies with the garlic. The heat balances the sweetness cleanly.
Questions Cooks Keep Asking
Why is my sweet and sour chicken not crispy?
The most common cause is cool oil under 340°F / 171°C, followed by sitting in the sauce too long. Fry at 350°F / 175°C, rest on a rack (not paper), and toss with sauce for under 45 seconds off the heat.
Can I use chicken breast instead of thigh?
Yes, but cut smaller cubes at 3/4 inch and reduce the fry to 3 minutes per batch. Pull at 160°F / 71°C and rest so carryover finishes the cook without drying the meat.
What is the sauce ratio for sweet and sour chicken?
Roughly 2 parts sugar to 1 part rice vinegar by volume, plus ketchup for color and body. In this recipe that reads as 1/2 cup brown sugar, 1/2 cup vinegar, and 1/3 cup ketchup, which itself carries additional sugar.
How long does sweet and sour chicken take to make?
About 30 minutes start to finish: 15 minutes to prep and coat, then 15 minutes to fry the chicken in two batches and glaze with the vegetables. Cutting uniform 1-inch cubes keeps every piece cooking at the same rate.
Can I make the sauce ahead?
Yes. Whisk the sauce base up to 3 days in advance and refrigerate. Keep the cornstarch slurry separate and add it only when you glaze the pan, since a pre-slurried sauce turns cloudy in the fridge.
What vinegar works if I do not have rice vinegar?
Apple cider vinegar is the closest substitute; use 3 tbsp cider vinegar plus 1 tbsp water to soften its punch. Distilled white vinegar reads too sharp and is best avoided unless it is all you have.
Is this recipe gluten-free?
Yes with one swap: replace regular soy sauce with tamari or a certified gluten-free soy sauce. Cornstarch and rice vinegar are already gluten-free, and ketchup usually is, though it is worth checking the label.
Save this recipe for later
Pin the crispy 30-minute takeout copycat to your dinner board so it is ready next weeknight.
Pin to PinterestSweet and Sour Chicken (Crispy 30-Minute Takeout Copycat)
A 30-minute version of the takeout dish with a double-cornstarch coat and a 2:1 sugar-to-vinegar sauce
- 1.5 lb boneless skinless chicken thighs cut into 1-inch cubes
- 1 tsp fine salt
- 0.5 tsp white pepper
- 1 large egg beaten
- 0.75 cup cornstarch divided
- 0.5 cup rice vinegar
- 0.5 cup light brown sugar
- 0.33 cup ketchup
- 3 tbsp pineapple juice from the can
- 1 tbsp soy sauce
- 1 tbsp cornstarch mixed with 2 tbsp cold water
- 1 large red bell pepper cut into 1-inch pieces
- 1 large green bell pepper cut into 1-inch pieces
- 1 cup pineapple chunks drained
- 2 cloves garlic minced
- 1 tsp fresh ginger minced
- 2 green onions green onions sliced, for finish
Season and coat the chicken
Toss the cubed chicken with salt and white pepper, then with 1/4 cup of the cornstarch until every piece looks dusty. Add the beaten egg, mix, then toss with the remaining 1/2 cup cornstarch.
Whisk the sauce
In a bowl, combine rice vinegar, brown sugar, ketchup, pineapple juice, and soy sauce until the sugar dissolves. Set the cornstarch slurry beside the stove for later.
Shallow-fry the chicken
Heat the oil in a wide skillet or wok to 350°F / 175°C. Fry in two batches, 4 to 5 minutes per batch, turning once, until deeply golden and reading 165°F / 74°C in the center. Rest on a rack, not paper towels.
Cook the vegetables
Pour off all but 1 tbsp oil. Add the peppers and stir-fry for 90 seconds over high heat, then add garlic, ginger, and pineapple for another 30 seconds. The peppers should still snap.
Glaze off the heat
Pour the whisked sauce into the pan, bring to a simmer, then stir in the slurry. When the sauce turns glossy and coats a spoon, kill the heat, add the fried chicken, and toss twice. Serve immediately with green onions and steamed rice.
- Wide skillet or wok
- Rack
Serve immediately, with steamed jasmine or long-grain white rice and a quick smashed cucumber salad
Did You Try Our Recipe ?
Scrumptious
My husband (who is extremely picky) loved the liver & onions so much!! I didn’t have any beef broth or Sherry so I used about a tbl of Worcestershire and 1/4 c of white wine …..it was scrumptious
Response from MeatRecipesBox
Oh wow, I’m so happy to hear that!! 😍 I love that you made it work with what you had on hand — Worcestershire and white wine sound like a delicious twist. So glad your husband enjoyed it, especially being picky! Thank you for sharing your version, it makes me smile knowing it turned out scrumptious!
This was amazing
This recipe turned out really amazing! It’s juicy and spiced deliciously. I definitely would use less of the spicy pepper next time, but it really was delicious and I don’t think I’ll make chicken legs any other way from now on.!
Response from MeatRecipesBox
Thank you for taking the time to leave such a thoughtful review. I’m really glad to hear the recipe turned out juicy and full of flavor for you. That’s exactly what I was hoping for when putting it together. Good call on the spicy pepper as well. Adjusting the heat level to your own taste is always the best approach, and using a little less next time should make it just right for you. I really appreciate you trying the recipe and sharing your experience. It’s great to know it worked so well for you.
I Didn’t Expect This Cornbeef Hash Recipe to Taste This Good!!
One skillet. A handful of simple ingredients. Thirty minutes on the clock. And somehow… I ended up with the crispiest, most comforting cornbeef hash recipe I’ve made in years.
I wasn’t expecting much—just a quick, no-fuss meal. But that first bite? Crispy edges, tender potatoes, smoky corned beef, a little kick of pepper. It tasted like something straight off a cozy diner griddle.
Honestly, it caught me off guard—in the best way. Here’s why this simple skillet completely won me over.


