

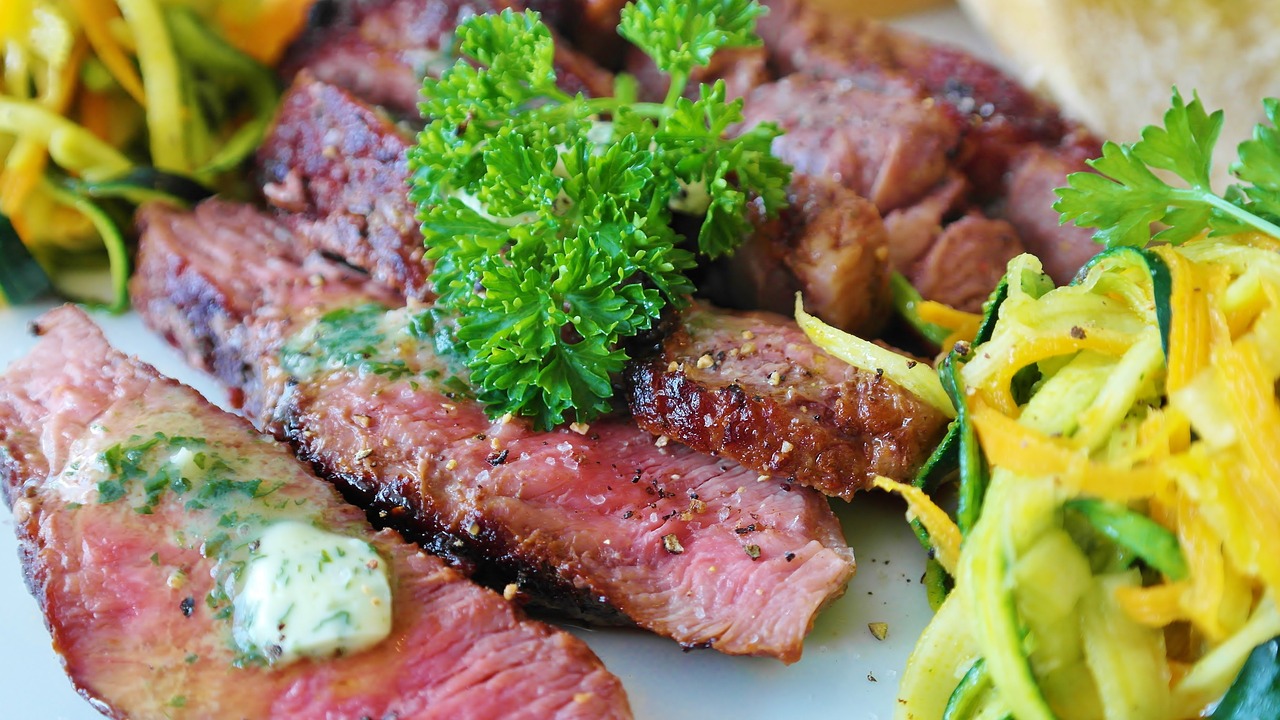
What is Santa Maria tri-tip?
Santa Maria tri-tip is the signature dish of California’s Santa Maria Valley barbecue tradition — a style so specific it’s protected by the state as a piece of cultural heritage. The dish was popularized in the 1950s by butcher Bob Schutz at a Safeway in Santa Maria, who took a scrap-cut triangular piece from the bottom sirloin, roasted it whole over red oak, and sold it as steak.
Seventy years later, the recipe hasn’t changed much. Simple rub, hot fire, red oak smoke, slice thin. If you’re new to fire-cooked whole muscles, our beef cuts guide covers the sirloin family this cut comes from.
What cut of beef is tri-tip?

Buy from a butcher who trims it properly: a full 2 to 2.5 lb roast with the fat cap left on top (¼-inch), silverskin removed from the underside, and no unrolled tail flap. If your grocery store sells it pre-marinated in teriyaki, walk away — you want the raw roast, not a shortcut.
Ingredients — the authentic Santa Maria rub
The rub (SPG)
- 1 tbsp kosher salt
- 1 tbsp coarsely ground black pepper
- 1 tbsp granulated garlic (not garlic salt)
- ½ tsp dried parsley (optional, purists split)
The beef & fire
- 1 whole tri-tip roast, 2 to 2.5 lb
- 2 cups red oak chips or chunks
- Lump charcoal (about 4 lb)
Traditional sides (optional)
- Pinquito beans (Santa Maria’s local heirloom)
- Fresh salsa (tomato, chile, onion, cilantro)
- Grilled garlic bread
- Green salad with vinaigrette
How do you cook Santa Maria tri-tip step by step?
Two zones, two stages: sear over direct heat to build a crust, then finish over indirect heat until the interior hits 130 °F. On a kettle grill, that means banking coals to one side. On a gas grill, light half the burners high and leave the other half off.
- Trim and rub. Pat the tri-tip dry with paper towels. Trim silverskin from the bottom; leave the ¼-inch fat cap on top. Mix salt, pepper, garlic (and parsley) in a small bowl. Rub all over — top, bottom, sides — pressing the rub in with your hands.
- Rest at room temp. Let the roast sit uncovered on a rack for 30–45 minutes. This dries the surface for a better sear and takes the chill off the middle.
- Build a two-zone fire. Light a chimney of lump charcoal, dump it into one side of the grill, and add a handful of red oak chunks on top. Target grill temperature: 400–450 °F on the direct side, 275–300 °F indirect.
- Sear, fat-side up first. Place the tri-tip over direct heat, fat cap facing up. Sear 4–5 minutes until deeply browned. Flip, sear the second side 4–5 minutes. Don’t move it around — you want a hard crust.
- Move to indirect. Slide the roast to the cool side, fat cap up. Close the lid, keep a vent open above the meat to draw smoke across it.
- Cook to temp, not time. Insert a probe thermometer into the thickest part. Pull the roast at 128 °F for medium-rare (it’ll climb to 130–132 °F during rest). Total indirect time is roughly 20–30 minutes depending on thickness. Never guess — always probe.
- Rest, tented. Move the tri-tip to a cutting board, tent loosely with foil, rest 10 minutes. Skipping this step is why home cooks end up with dry tri-tip — the juices need to redistribute.
- Find the grain — twice. Look at the roast. You’ll see grain running one way in the wide “hip” and a different way in the narrow “tail.” Cut the roast in half where the grain changes direction, then slice each half thinly against its own grain, ¼-inch thick.
- Serve immediately. Overlap slices on a warm platter, drizzle any accumulated juices from the board over the top, and serve with pinquito beans and salsa.

Internal temperature guide for tri-tip
Tri-tip is a lean cut with almost no connective tissue — it does not like to be cooked past medium. Aim for medium-rare and pull early; carryover heat does the rest. USDA safe minimum for whole cuts of beef is 145 °F, per USDA FSIS.
| Doneness | Pull temp | Final temp after rest |
|---|---|---|
| Rare | 120 °F | 122–125 °F |
| Medium-rare (recommended) | 128 °F | 130–132 °F |
| Medium | 135 °F | 138–140 °F |
| Medium-well | 145 °F | 148–150 °F |
| Well done (not recommended) | 155 °F | 160 °F+ |
Watch it done Santa Maria style
Authentic live-fire tri-tip on red oak with the traditional SPG rub — watch the full walkthrough on YouTube.
How do you slice tri-tip correctly?
Hold the tip of the roast steady with a fork, tilt your knife at a slight bias, and cut in one smooth pull. A long, thin slicing knife (10 to 12 inches) beats a chef’s knife here. If you’re stuck with a shorter blade, our carving knife guide covers what actually matters at this size.

What do you serve with Santa Maria tri-tip?
The traditional Santa Maria plate is pinquito beans, fresh salsa, grilled garlic bread, and a green salad — a fixed spread that hasn’t changed since the 1950s ranch cookouts. Pinquito is a small pink heirloom bean grown almost exclusively in the Santa Maria Valley; if you can’t find them, small red beans are the closest substitute.
Modern pairings that still fit the style:
- Grilled asparagus or spring onions — brushed with olive oil, hit with the same SPG.
- Roasted corn on the cob with lime and cotija.
- A dry, herbal California red — a Central Coast Syrah or Zinfandel from Paso Robles is a natural regional match.
- Tri-tip sandwiches the next day — pile slices on garlic bread with salsa and horseradish. Also excellent inside our beef tacos.
Can I cook tri-tip in the oven or on a smoker?
Both methods produce excellent tri-tip, but you sacrifice the specific flavor of live red oak. If authenticity matters, use a charcoal grill with real wood chunks. If speed matters, the oven reverse-sear is the fastest reliable path — and pairs well with our reverse sear guide.
Common mistakes and how to fix them
The tri-tip is chewy no matter what
You sliced with the grain. This is the #1 tri-tip mistake — and it’s not something you can fix after the fact. Look at the raw roast, note the two grain directions, and split the cut in half at the seam before you slice. Cutting thin (¼-inch) helps too.
The middle is raw when the outside is done
Your fire was too hot or you skipped the two-zone setup. The sear should build a crust in 4–5 minutes per side, not 10. Move the roast to indirect the moment it’s browned, and finish gently.
The rub washed off / the crust is soft
Wet meat, or too little salt. Pat the tri-tip completely dry before rubbing, and let it rest uncovered at room temp for 30 minutes so the surface dries. Salt should be visible on the meat, not a light dusting.
Frequently asked
How long does tri-tip take to cook?
A 2.5-lb tri-tip takes about 35–40 minutes total — 8–10 minutes searing, 20–25 minutes indirect, then 10 minutes resting. Cook time varies with roast thickness and grill temperature, so use a probe thermometer and pull at 128 °F for medium-rare.
Do I need red oak for real Santa Maria tri-tip?
For strict authenticity, yes — coast live oak (Quercus agrifolia) is the traditional wood and gives the dish its signature flavor. Post oak or white oak are close substitutes. Avoid mesquite (too aggressive) and fruit woods (too sweet for this cut).
Can I marinate tri-tip?
You can, but authentic Santa Maria style doesn’t. The whole point of the SPG rub and red oak smoke is to taste the beef itself. If you want to marinate, keep it under 4 hours in something acidic-light — the cut is already tender and doesn’t need enzymatic breakdown.
What’s the difference between tri-tip and picanha?
Different muscles. Picanha (top sirloin cap) is from the biceps femoris with a thick fat cap, popular in Brazilian churrasco. Tri-tip is from the bottom sirloin, leaner, with a smaller fat cap and the signature two-directional grain. Similar cook style, distinct textures.
Is tri-tip good for smoking low and slow?
Not really — tri-tip is too lean for a long smoke and turns dry past medium. Reverse-sear on a smoker is the right hybrid: 225 °F until 125 °F internal, then a hard sear to finish. Save the long smokes for brisket and chuck roast.
Can I freeze leftover tri-tip?
Yes. Slice it, portion into flat freezer bags with any accumulated juices, and freeze up to 3 months. Reheat gently in a covered skillet with a splash of beef broth, or shave frozen slices onto a hot cast-iron pan for a 30-second sear — leftover tri-tip sandwiches are a Santa Maria tradition in their own right.
A note from Emma
The first time I cooked tri-tip properly was at a friend’s ranch outside San Luis Obispo — a hard sear on a hinged grate over live oak, then a slow slide off the coals while the fire settled. What surprised me wasn’t the flavor; it was how little the rub had to do. Salt, pepper, garlic, smoke. That’s the recipe. Everything else is technique.
Get the fire right, cook to 128, rest 10 minutes, slice against two grains. Do those four things and you’ve cooked one of the best pieces of beef in American BBQ. If you want to keep exploring live-fire beef, our reverse sear guide and brisket recipes hub are the next stops.
Did You Try Our Recipe ?
Scrumptious
My husband (who is extremely picky) loved the liver & onions so much!! I didn’t have any beef broth or Sherry so I used about a tbl of Worcestershire and 1/4 c of white wine …..it was scrumptious
Response from MeatRecipesBox
Oh wow, I’m so happy to hear that!! 😍 I love that you made it work with what you had on hand — Worcestershire and white wine sound like a delicious twist. So glad your husband enjoyed it, especially being picky! Thank you for sharing your version, it makes me smile knowing it turned out scrumptious!
This was amazing
This recipe turned out really amazing! It’s juicy and spiced deliciously. I definitely would use less of the spicy pepper next time, but it really was delicious and I don’t think I’ll make chicken legs any other way from now on.!
Response from MeatRecipesBox
Thank you for taking the time to leave such a thoughtful review. I’m really glad to hear the recipe turned out juicy and full of flavor for you. That’s exactly what I was hoping for when putting it together. Good call on the spicy pepper as well. Adjusting the heat level to your own taste is always the best approach, and using a little less next time should make it just right for you. I really appreciate you trying the recipe and sharing your experience. It’s great to know it worked so well for you.
I Didn’t Expect This Cornbeef Hash Recipe to Taste This Good!!
One skillet. A handful of simple ingredients. Thirty minutes on the clock. And somehow… I ended up with the crispiest, most comforting cornbeef hash recipe I’ve made in years.
I wasn’t expecting much—just a quick, no-fuss meal. But that first bite? Crispy edges, tender potatoes, smoky corned beef, a little kick of pepper. It tasted like something straight off a cozy diner griddle.
Honestly, it caught me off guard—in the best way. Here’s why this simple skillet completely won me over.


