

Recipe at a glance
- Prep15 min
- Cook15 min
- Total30 min
- Serves4
- Calories~520 / serving
- LevelEasy
What Is Chicken Milanese, Really?
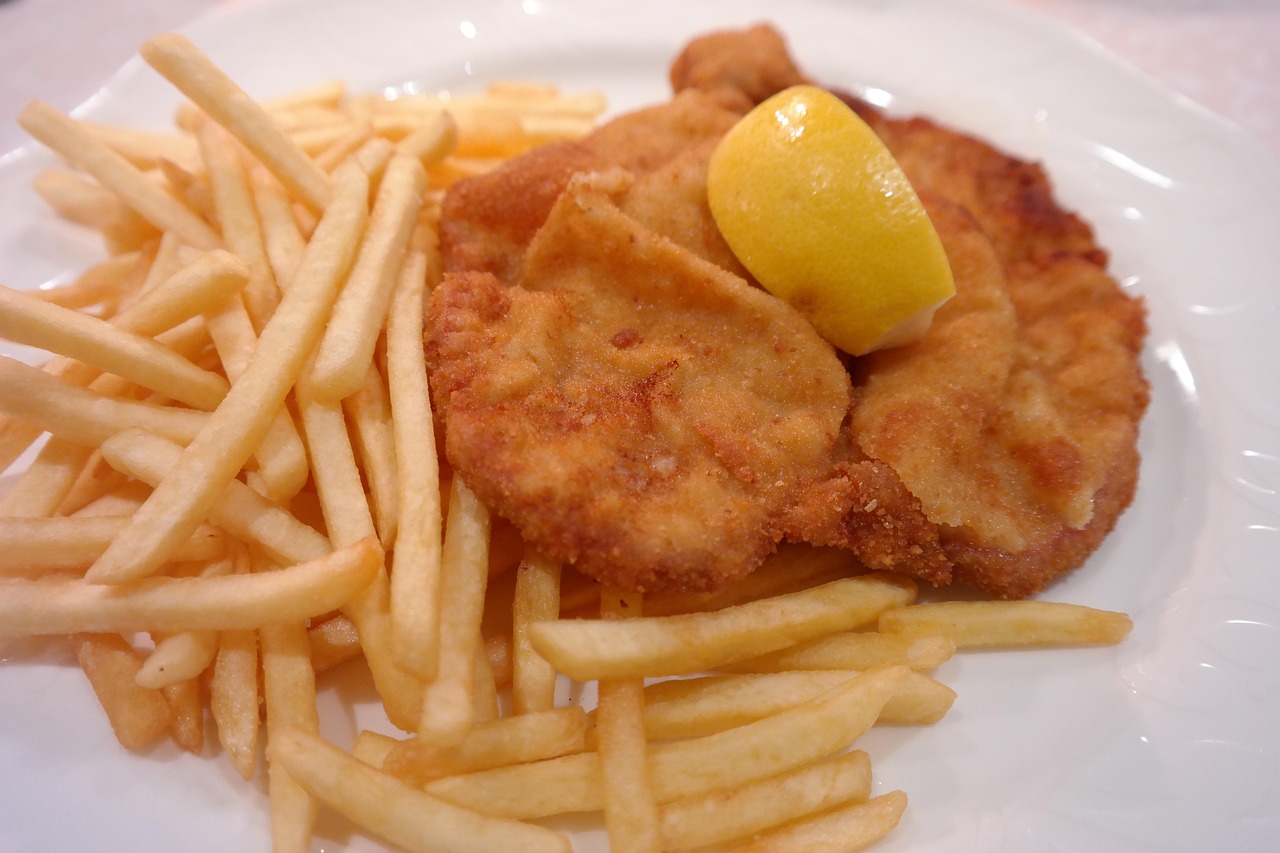
Chicken Milanese is the poultry cousin of cotoletta alla Milanese, the bone-in veal cutlet from Milan whose earliest written mention appears in a 1134 banquet menu at the Basilica of Sant’Ambrogio. When 20th-century Italian cooks needed a faster, cheaper weeknight version, they swapped in pounded chicken breast, kept the flour-egg-breadcrumb triple coat, and shallow-fried it in butter.
The arugula salad on top is a modern Italian-American twist, popularized by New York trattorias in the 1990s. It works because the peppery greens and acidic lemon cut through the richness of the fried cutlet — think of it as a self-contained sauce and salad in one. If you like this style of one-plate meal, our chicken piccata follows the same “cutlet + bright sauce” logic.
Milanese vs. schnitzel vs. katsu — what’s the difference?
| Milanese (IT) | Schnitzel (AT) | Katsu (JP) | |
|---|---|---|---|
| Coating | Fine breadcrumbs | Fine breadcrumbs | Panko (coarse) |
| Fat | Olive oil + butter | Lard or clarified butter | Neutral oil, deep-fry |
| Meat | Chicken or veal | Veal (real Wiener) or pork | Pork or chicken |
| Serve | Lemon + arugula | Lemon + potato salad | Tonkatsu sauce + cabbage |
Ingredients — 4 Servings

For the cutlets
- 4 boneless, skinless chicken breasts (about 700 g / 1.5 lb)
- 1 cup (120 g) all-purpose flour
- 2 large eggs, beaten with 1 tbsp water
- 1½ cups (150 g) fine dried breadcrumbs — or half breadcrumbs, half finely grated Parmigiano-Reggiano DOP
- 1 tsp fine sea salt + freshly cracked pepper
- 3 tbsp olive oil + 2 tbsp unsalted butter (for the pan)
- Lemon wedges to serve
For the arugula salad
- 4 packed cups (100 g) baby arugula (rocket)
- 1 cup (150 g) cherry tomatoes, halved (optional but classic)
- ¼ small red onion, shaved paper-thin
- 3 tbsp extra-virgin olive oil
- 1½ tbsp fresh lemon juice + ½ tsp zest
- 50 g Parmigiano-Reggiano, shaved with a peeler
- Flaky salt + black pepper
How to Make Chicken Milanese — Step by Step
Method — 30 minutes, no fuss
- Butterfly and pound. Halve each breast horizontally to make 2 thin cutlets. Place between two sheets of parchment and pound with a meat mallet (or the flat side of a heavy pan) to an even ¼ inch / 6 mm thick. Even thickness is everything — thick spots stay pink, thin spots dry out.
- Set up the breading station. Three shallow dishes: seasoned flour, beaten egg, breadcrumbs. Season each cutlet lightly with salt and pepper first, then flour (shake off excess), egg (let it drip), breadcrumbs (press to adhere).
- Rest 5 minutes. Let the breaded cutlets sit on a rack. This lets the coating hydrate slightly so it clings during frying instead of sliding off.
- Heat the fat. In a large skillet, combine olive oil and butter over medium-high heat until the butter foams and the foam starts to subside — about 175 °C / 350 °F. If a breadcrumb dropped in sizzles vigorously without smoking, you’re there.
- Shallow-fry. Cook 2 cutlets at a time (never crowd), 3 minutes on the first side until deep gold, then 2 minutes on the second side. Internal temp should read 74 °C / 165 °F, the USDA-safe minimum for poultry.
- Drain on a wire rack, not paper towel — paper traps steam and softens the crust. Season with a pinch of flaky salt while hot.
- Dress the salad. Whisk oil, lemon juice, zest, salt and pepper in the salad bowl. Add arugula, tomatoes, and onion. Toss with your hands just before plating.
- Plate. One cutlet per plate, pile the dressed arugula directly on top, scatter shaved Parmigiano, tuck a lemon wedge on the side. Eat immediately.
Pan Temperature and Timing Cheat Sheet
| Stage | Temperature | Time | What’s happening |
|---|---|---|---|
| Butter + oil | 175 °C / 350 °F | ~2 min preheat | Butter foams, then foam subsides |
| First side | Medium-high | 3 min | Golden crust forms, cutlet 70% cooked |
| Second side | Medium-high | 2 min | Reaches 74 °C / 165 °F internal |
| Rest | Wire rack | 2 min | Juices redistribute, crust stays crisp |
Watch It Made (Chef Stefano Secchi on TODAY)
Rezdôra chef and 2022 James Beard winner Stefano Secchi shows the Italian technique end-to-end, from pounding to plating. His trick: add a little water to the beaten egg — it thins the coating so the crust stays delicate, not dense.
The Four Mistakes That Ruin Chicken Milanese
1. Skipping the pound
A ¾-inch breast has zero chance of cooking evenly in the time it takes the crust to color. You need ¼ inch, edge to edge. If pounding feels violent, butterfly first so you’re only working the meat down half as far.
2. Wet chicken
Pat the cutlets bone-dry with paper towel before the flour step. Surface moisture makes the coating gummy and it slides off in the pan. This is the same fundamental as our crispy chicken skin guide — dry surface, hot fat, don’t move it.
3. All oil, no butter
Straight oil frying works but the crust has no aroma. Butter is what makes a Milanese smell like a trattoria — the milk solids brown and perfume the whole cutlet. Add oil only to raise the smoke point so the butter doesn’t burn. Kenji López-Alt’s Serious Eats cutlet science covers the exact Maillard chemistry if you want to go deeper.
4. Dressing the salad early
Arugula wilts in 90 seconds under vinaigrette. Whisk the dressing first, add the greens last, toss and plate immediately. A tired salad on a crisp cutlet is a sad plate.
Serving and Wine Pairing
Traditional plating puts the cutlet flat on the plate and mounds the salad on top so the greens dress the meat as you cut. Add these on the side if you want to build a fuller meal:
- Blistered cherry tomatoes — 5 minutes in the same pan after the chicken comes out
- Lemony roasted potatoes — the classic Roman pairing
- A cold glass of Verdicchio, Vermentino, or Pinot Grigio — the acidity mirrors the lemon
- Crusty focaccia — for mopping up the lemon-oil that pools on the plate
For a bigger Italian spread, add our chicken Parmigiana as an alternate main, or serve the Milanese sliced over pasta for a Milanese-on-linguine dinner.
Storing and Reheating
Fridge: up to 3 days, cutlets and salad stored separately.
Reheat cutlets: 200 °C / 400 °F oven or air fryer for 5 minutes on a rack. Never microwave — the breadcrumb turns to wet paste.
Freeze: breaded but unfried cutlets freeze beautifully on a tray, then bag. Fry from frozen at slightly lower heat (160 °C / 325 °F) for 5 minutes per side.
Meal prep tip: Bread a double batch on Sunday, freeze half. Weeknight dinner is 15 minutes away.
Quick Answers
Can I use chicken thighs instead of breast?
You can, but you’re making a different dish. Thighs won’t pound as thin (the fibers push back), and the extra fat means longer cook time. If thigh is what you have, cut into strips and treat it more like chicken tenders — smaller pieces, same breading, deeper oil.
Can I bake or air-fry the Milanese?
Air fryer at 200 °C / 400 °F for 10 minutes, flipping once, gives 90% of the crunch with a fraction of the fat. Spritz both sides with oil before cooking. Oven-baking works too — 220 °C / 425 °F on a preheated sheet pan, 12 minutes total. Neither will taste as buttery as the skillet version.
What if my breadcrumbs won’t stick?
Three usual suspects: chicken wasn’t patted dry, flour layer was too heavy (shake harder), or the egg was under-beaten. Press the crumbs on firmly with the flat of your hand and let the breaded cutlets rest 5 minutes before they hit the pan.
What kind of breadcrumbs should I buy?
Fine, unseasoned Italian-style breadcrumbs — the powdery kind in the yellow canister. Panko is too coarse and reads as Japanese katsu. Homemade breadcrumbs from day-old bread pulsed in a food processor and dried in a low oven are the gold standard.
Is arugula the same as rocket?
Yes — arugula is the American name, rocket is the British and Australian name. Both refer to Eruca vesicaria. Wild arugula is more peppery than baby arugula; either works, though baby arugula is easier to source year-round.
The One-Line Version
Pound thin, triple-bread, fry in butter and oil, top with lemony arugula. It’s a 30-minute dinner that looks like restaurant food because it is restaurant food — just made honestly at home. Hungry for more? Browse the rest of our chicken recipe collection.
Did You Try Our Recipe ?
Chicken hears and gizzards
I would love you to send me the recipe please. I have no printer to print it off. [email protected]
Response from MeatRecipesBox
Hi Sharon, thank you so much for your kind words! I’ve just sent the full recipe to your inbox. Enjoy, and let me know how it turns out! 😊
Scrumptious
My husband (who is extremely picky) loved the liver & onions so much!! I didn’t have any beef broth or Sherry so I used about a tbl of Worcestershire and 1/4 c of white wine …..it was scrumptious
Response from MeatRecipesBox
Oh wow, I’m so happy to hear that!! 😍 I love that you made it work with what you had on hand — Worcestershire and white wine sound like a delicious twist. So glad your husband enjoyed it, especially being picky! Thank you for sharing your version, it makes me smile knowing it turned out scrumptious!
This was amazing
This recipe turned out really amazing! It’s juicy and spiced deliciously. I definitely would use less of the spicy pepper next time, but it really was delicious and I don’t think I’ll make chicken legs any other way from now on.!
Response from MeatRecipesBox
Thank you for taking the time to leave such a thoughtful review. I’m really glad to hear the recipe turned out juicy and full of flavor for you. That’s exactly what I was hoping for when putting it together. Good call on the spicy pepper as well. Adjusting the heat level to your own taste is always the best approach, and using a little less next time should make it just right for you. I really appreciate you trying the recipe and sharing your experience. It’s great to know it worked so well for you.
I Didn’t Expect This Cornbeef Hash Recipe to Taste This Good!!
One skillet. A handful of simple ingredients. Thirty minutes on the clock. And somehow… I ended up with the crispiest, most comforting cornbeef hash recipe I’ve made in years.
I wasn’t expecting much—just a quick, no-fuss meal. But that first bite? Crispy edges, tender potatoes, smoky corned beef, a little kick of pepper. It tasted like something straight off a cozy diner griddle.
Honestly, it caught me off guard—in the best way. Here’s why this simple skillet completely won me over.


