

Quick answer: Sticky honey garlic chicken thighs are bone-in, skin-on thighs coated in a 5-ingredient glaze (honey, soy sauce, garlic, rice vinegar, sesame oil) and roasted on a single sheet pan at 425 °F / 220 °C for 25–30 minutes, until the internal temp hits 175 °F / 79 °C — the sweet spot where thigh meat turns pull-apart tender and the glaze reduces to a proper lacquer. Total time from fridge to plate: 35 minutes.

This is the sheet-pan recipe on rotation in my kitchen — the one my kids ask for by name, the one I cook when I’ve had a 12-hour day and can’t think. Five pantry ingredients, one pan, no marinating, no browning in batches. The trick to actually sticky (not just wet) glaze is a two-stage bake. I’ll show you exactly what that looks like.
What Makes These Chicken Thighs Actually “Sticky”?
Sticky glaze is caramelized glaze. It happens when the sugars in the honey and soy sauce hit high dry heat and undergo the Maillard reaction — a browning process that concentrates flavor and turns liquid into lacquer. Most home recipes miss this because they either bake at too low a temperature (350 °F just steams the sauce) or they cover the pan with foil (traps moisture, kills the crust).
The fix is simple. Bake uncovered at 425 °F, and give the glaze one extra pass in the final 5 minutes — either brush on a reserved half-batch of sauce or crank the broiler to finish. That’s how you get the sticky crackle that separates this dish from a wet, sad tray of chicken.
Ingredients (Serves 4 — Uses 8 Thighs)
For the chicken
- 8 bone-in, skin-on chicken thighs (about 2½–3 lb / 1.2 kg)
- 1 tbsp neutral oil (avocado or grapeseed)
- Kosher salt + freshly cracked black pepper
For the honey garlic glaze
- ½ cup (170 g) honey
- ⅓ cup (80 ml) low-sodium soy sauce or tamari
- 6 garlic cloves, finely minced (a rasp grater is your friend)
- 2 tbsp rice vinegar (or apple cider vinegar)
- 1 tsp toasted sesame oil
- 1 tsp fresh grated ginger (optional, but recommended)
- ½ tsp red-pepper flakes (optional, for heat)
To finish
- 1 tbsp toasted sesame seeds
- 2 scallions, thinly sliced
- Fresh lime wedges
How to Make Sheet-Pan Honey Garlic Chicken Thighs
- Preheat and prep. Preheat oven to 425 °F / 220 °C with a rack in the upper-middle position. Line a rimmed sheet pan with parchment or foil for easy cleanup — the glaze will burn onto bare metal.
- Dry the chicken. Pat every thigh bone-dry with paper towels. This is non-negotiable if you want crispy skin — moisture = steam = flabby skin. Season both sides with salt and pepper, drizzle with the neutral oil, and rub it in.
- Whisk the glaze. Combine honey, soy sauce, garlic, vinegar, sesame oil, ginger, and pepper flakes in a bowl. Whisk until smooth. Reserve half the glaze in a separate small bowl — you’ll brush it on later. Pour the rest over the chicken and toss to coat.
- Arrange skin-side up. Lay the thighs skin-side up on the sheet pan, spaced apart so they roast (not steam). Pour any glaze left in the mixing bowl over the tops.
- Roast 20 minutes. Slide into the oven and roast for 20 minutes untouched.
- Brush with reserved glaze + finish. Pull the pan out, brush the tops of each thigh with the reserved glaze, and return to the oven for 5–8 more minutes. For extra caramelization, switch to broil for the final 2 minutes — watch closely, honey burns in seconds.
- Check the temp, then rest. Insert an instant-read thermometer into the thickest part of a thigh, avoiding the bone. You want 175 °F / 79 °C — thighs are safe at 165, but 175 is where the collagen breaks down and the meat turns silky. Rest 5 minutes on the pan.
- Garnish and serve. Scatter sesame seeds and scallions across the top, squeeze a lime wedge over each thigh, and serve straight from the pan.
Why 175 °F, Not 165 °F, for Chicken Thighs?

Chicken breast peaks at 160–165 °F because it’s lean. Push it higher and it dries out. Thighs are the opposite — they’re loaded with connective tissue and fat that need heat to break down. At 165 °F, a thigh is technically safe but still chewy in spots. At 175–180 °F, the collagen dissolves into gelatin and the meat gets that silky, pull-apart texture that made you love thighs in the first place.
USDA calls 165 °F the safe minimum for all poultry (see the USDA FSIS Safe Temperature Chart). Anything above that is a quality choice, and for thighs, that choice is 175. If you’re new to reading chicken by temperature, our full chicken internal temperature guide covers breast, wings, whole bird, and ground chicken side by side.
Bone-In vs Boneless: How to Adjust
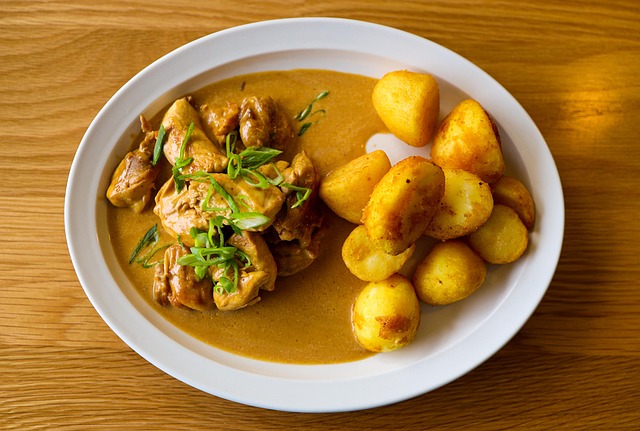
Bone-in gives you juicier meat and crispier skin because the bone insulates the interior. Boneless is faster and easier for kids to eat. Both work with this recipe — just adjust the time and temp.
| Thigh style | Oven temp | Total bake time | Internal target |
|---|---|---|---|
| Bone-in, skin-on (default) | 425 °F / 220 °C | 25–30 min | 175 °F / 79 °C |
| Boneless, skinless | 425 °F / 220 °C | 18–22 min | 170 °F / 77 °C |
| Boneless, skin-on | 425 °F / 220 °C | 22–25 min | 170 °F / 77 °C |
| Drumsticks (bonus swap) | 425 °F / 220 °C | 30–35 min | 175 °F / 79 °C |
What to Serve With It
Sticky, sweet, garlicky chicken wants three things on the plate: something starchy to soak up the glaze, something green to cut the richness, something acidic to balance the honey. My default is:
- Starch: steamed jasmine rice, coconut rice, or garlicky mashed potatoes
- Green: roasted broccoli (toss it on the same sheet pan for the last 15 minutes), snap peas, or a quick smashed cucumber salad
- Acid: lime wedges, a spoon of quick-pickled red onion, or a splash of rice vinegar over the veg
If you want to turn this into a true one-pan dinner, add halved baby potatoes to the pan at the start (they need the full 30 minutes) and broccoli florets in the last 15. Everything comes out sticky and glazed together. For more shortcut sheet-pan combinations, our sheet-pan dinner ideas collection has 15 more.
Storage, Reheating, and Meal Prep
This chicken is actually better the next day — the glaze soaks into the meat overnight. It’s a meal-prep dream.
- Fridge: Cool completely, then store in an airtight container for up to 4 days.
- Reheat: Best in a 375 °F oven for 8–10 minutes, or a covered skillet over medium-low with 1 tbsp of water for 6 minutes. The microwave works in a pinch but softens the skin.
- Freezer: Cooked thighs freeze well for 2 months. Thaw overnight in the fridge, then reheat as above. The skin loses some crackle after freezing, but the flavor stays intact.
- Meal prep: Portion into containers with rice and a green veg. Squeeze fresh lime over just before eating, not before storing.
The Glaze Deep-Dive: Ratios That Actually Work

The best honey garlic glaze is 1.5 parts sweet, 1 part salty, ¼ part sour, plus aromatics. In this recipe that’s ½ cup honey (sweet), ⅓ cup soy sauce (salty), 2 tbsp rice vinegar (sour), plus 6 cloves of garlic and a hit of sesame. If you tinker with the ratio, keep those proportions and you’ll always land on something delicious.
Common swaps that work:
- Honey → maple syrup: Slightly less sticky, more caramel-forward. Cuts the sweetness by ~15%.
- Soy sauce → tamari or coconut aminos: Gluten-free; coconut aminos is sweeter, so cut the honey by 1 tbsp.
- Rice vinegar → apple cider vinegar: Sharper. Use 1½ tbsp instead of 2.
- Add sriracha: 1–2 tsp gives you a “hot honey” version.
Common Questions
Do I need to marinate the chicken?
No. This recipe is intentionally no-marinate — the glaze bakes onto the surface and forms a lacquer in the oven. If you want deeper flavor, you can marinate up to 4 hours in half the glaze, but skip anything longer; the vinegar starts to break down the meat and the salt draws too much moisture out.
Why did my glaze burn?
Honey burns fast above 350 °F. If your pan looks scorched, one of three things happened: (1) you didn’t line the pan and the exposed sauce carbonized, (2) your oven runs hot — check with an oven thermometer, or (3) you broiled too long at the end. Broil in 30-second increments and stay by the oven.
Can I use chicken breasts instead?
Yes, but expect drier meat. Bone-in breasts: 425 °F for 30 minutes to 165 °F internal. Boneless breasts: 425 °F for 18–20 minutes to 160 °F (pulled). Breasts don’t have the collagen buffer thighs do, so pull them right at temp — no hovering around 175 °F.
How do I make the glaze thicker?
Two options: (1) reduce the honey by 1 tbsp and add 1 tsp cornstarch to the glaze mix before whisking, or (2) once the chicken is done, pour the pan drippings into a small saucepan and simmer 3 minutes until it coats a spoon. Pour back over the chicken to serve.
Can I make this in an air fryer?
Yes. Air-fry at 400 °F for 20 minutes, flipping halfway. Brush with reserved glaze in the final 3 minutes. The air fryer gives you extra crispy skin but less pan sauce, so serve with extra glaze on the side or over rice.
The Weeknight Winner
Sheet-pan honey garlic chicken thighs are the recipe I recommend when someone tells me they “don’t know how to cook chicken.” It’s foolproof, forgiving, and produces restaurant-level results with five ingredients you already own. Master this one and you’ll have a permanent line item on the weekly rotation.
Ready for more sheet-pan ease? Try our sheet-pan chicken fajitas for a Tex-Mex spin, or step up to spatchcock roast chicken for a weekend project that uses the same 425 °F + high-heat-glaze trick on a whole bird.
Did You Try Our Recipe ?
Chicken hears and gizzards
I would love you to send me the recipe please. I have no printer to print it off. [email protected]
Response from MeatRecipesBox
Hi Sharon, thank you so much for your kind words! I’ve just sent the full recipe to your inbox. Enjoy, and let me know how it turns out! 😊
Scrumptious
My husband (who is extremely picky) loved the liver & onions so much!! I didn’t have any beef broth or Sherry so I used about a tbl of Worcestershire and 1/4 c of white wine …..it was scrumptious
Response from MeatRecipesBox
Oh wow, I’m so happy to hear that!! 😍 I love that you made it work with what you had on hand — Worcestershire and white wine sound like a delicious twist. So glad your husband enjoyed it, especially being picky! Thank you for sharing your version, it makes me smile knowing it turned out scrumptious!
This was amazing
This recipe turned out really amazing! It’s juicy and spiced deliciously. I definitely would use less of the spicy pepper next time, but it really was delicious and I don’t think I’ll make chicken legs any other way from now on.!
Response from MeatRecipesBox
Thank you for taking the time to leave such a thoughtful review. I’m really glad to hear the recipe turned out juicy and full of flavor for you. That’s exactly what I was hoping for when putting it together. Good call on the spicy pepper as well. Adjusting the heat level to your own taste is always the best approach, and using a little less next time should make it just right for you. I really appreciate you trying the recipe and sharing your experience. It’s great to know it worked so well for you.
I Didn’t Expect This Cornbeef Hash Recipe to Taste This Good!!
One skillet. A handful of simple ingredients. Thirty minutes on the clock. And somehow… I ended up with the crispiest, most comforting cornbeef hash recipe I’ve made in years.
I wasn’t expecting much—just a quick, no-fuss meal. But that first bite? Crispy edges, tender potatoes, smoky corned beef, a little kick of pepper. It tasted like something straight off a cozy diner griddle.
Honestly, it caught me off guard—in the best way. Here’s why this simple skillet completely won me over.


