


Chicken Thighs: The 425°F Method for Crispy Skin Every Time
Chicken breasts get the marketing, but thighs get the flavor. The dark meat carries roughly 8–10% intramuscular fat versus about 1–2% in breast, which is why thighs stay juicy even when you drift past the safe temperature. That forgiving margin is the whole reason home cooks — and half the restaurant menus you’ve ever ordered from — quietly rely on them.
This is the base method I come back to, plus four flavor turns (garlic butter, hot honey, lemon-herb, teriyaki) once you’ve got the timing memorized. If you’d rather braise them low and slow, our 6-ingredient slow cooker chicken thighs takes over from there.
Key Takeaways
- Bone-in, skin-on: 425°F for 35–40 minutes, target 165°F internal (USDA FSIS).
- Boneless, skinless: 425°F for 22–28 minutes, same 165°F target.
- Dry skin + a wire rack = crackling skin without deep frying.
- Thighs tolerate an extra 5°F of overshoot without going dry — start checking early, but don’t panic.
How Long to Cook Chicken Thighs (Every Method)
Cook time swings by cut and method more than most people expect. Bone-in adds about 12–15 minutes over boneless because heat has to travel through bone before the meat next to it finishes. Skin-on adds nothing to the timer — but it earns its keep on the plate.
| Method | Bone-in, skin-on | Boneless, skinless | Internal temp |
|---|---|---|---|
| Oven, 425°F | 35–40 min | 22–28 min | 165°F / 74°C |
| Oven, 375°F | 45–55 min | 30–35 min | 165°F / 74°C |
| Skillet (medium-high) | 25–30 min, skin down first 15 | 10–12 min, flip once | 165°F / 74°C |
| Grill (medium, ~400°F) | 25–30 min, indirect | 10–14 min, direct | 165°F / 74°C |
| Air fryer, 400°F | 22–26 min, flip halfway | 14–18 min | 165°F / 74°C |
| Slow cooker, low | 6–7 hours | 4–5 hours | Fall-apart tender |
The USDA safe target is 165°F, but thighs actually eat best around 175–185°F — connective tissue starts breaking down above 170°F, and unlike breast, the fat protects them from drying out. If your thermometer says 180°F and the skin is bronze, you’re not late, you’re right on time.

The Base Recipe: Crispy Baked Chicken Thighs
Crispy Baked Chicken Thighs
Ingredients
- 6 bone-in, skin-on chicken thighs (about 2 lb / 900 g)
- 1 tbsp olive oil or melted butter
- 1 tsp kosher salt (½ tsp if table salt)
- 1 tsp smoked paprika
- 1 tsp garlic powder
- ½ tsp onion powder
- ½ tsp black pepper
- ¼ tsp dried thyme (optional)
Instructions
- Dry the skin. Pull thighs from the package 30 minutes before cooking. Pat every side dry with paper towels, twice. Wet skin steams; dry skin crisps. This is 80% of the game.
- Preheat to 425°F (220°C, fan 400°F / 200°C). Set a wire rack inside a rimmed sheet pan — the rack lets hot air circulate under the skin. No rack? Use the pan directly, but expect the underside to be softer.
- Season. Mix the spices in a small bowl. Rub each thigh with a light coat of oil, then dust generously — top, bottom, and under the skin if you can slide a finger in.
- Arrange skin-side up, spaced apart. Crowding = steam = flabby skin.
- Bake 35–40 minutes until an instant-read thermometer in the thickest part (not touching bone) reads 165°F. For extra shatter, broil the last 2 minutes — watch it, broilers move fast.
- Rest 5 minutes, then serve. Juices settle back into the meat; cut too soon and they end up on the cutting board.
Watch: The 40-Minute Method in Real Time
If you learn better by watching than reading, this short walk-through shows the same 425°F approach, the wire rack trick, and how the skin should look when it’s actually done (not just “brown-ish”):
Four Flavor Turns Once You’ve Nailed the Base
1. Garlic Butter Thighs
Skip the paprika. Mix 3 tbsp softened butter with 4 minced garlic cloves, 1 tsp lemon zest, and chopped parsley. Slide half under the skin, rub the rest on top. Bake as written. The garlic browns without burning because it’s insulated by butter and skin.
2. Hot Honey Chicken Thighs
Bake as written for 30 minutes. Meanwhile, warm ⅓ cup honey with 1 tbsp hot sauce (Frank’s or Crystal), 1 tsp apple cider vinegar, and a pinch of red pepper flakes. Brush over the thighs, return to the oven 5–10 minutes until sticky and 165°F. This is the move that made Food Network’s hot honey chicken a repeat menu item.
3. Lemon-Herb Sheet Pan
Toss 1 lb baby potatoes and 2 sliced lemons with olive oil, salt, and rosemary. Push to the pan edges, thighs in the middle. Same 425°F, same 40 minutes — potatoes crisp in rendered chicken fat, lemons caramelize into a jammy garnish.
4. Teriyaki-Style
Whisk ¼ cup soy sauce, 3 tbsp brown sugar, 1 tbsp mirin (or dry sherry), 1 tsp grated ginger, 1 clove grated garlic. Marinate boneless thighs 30 minutes, then bake at 425°F for 22 minutes, brushing with reduced marinade twice. For a full Hawaiian version, see our shoyu chicken recipe.
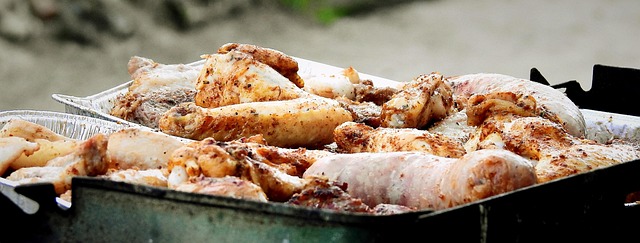
Bone-in vs. Boneless: Which Should You Buy?
Bone-in thighs run about $2.99–$3.99 per pound in most U.S. supermarkets, versus $4.49–$5.99 for boneless. The bone conducts heat and adds collagen to the pan drippings — pull it out after cooking, save it for stock. Two thighs’ worth of bones plus a carrot and an onion makes a quart of broth that outperforms anything in a carton.
Common Mistakes That Turn Great Thighs Mediocre
Skipping the dry step
Skin needs to be desert-dry going into the oven. If you’re organized, salt the thighs uncovered on a rack in the fridge for 4–24 hours (a dry brine). If you’re not, pat them with paper towels until the paper stops taking up moisture. Wet skin will never crisp — it will steam and then flabby-brown.
Roasting at 350°F
350°F is a defensive temperature. It works, but the skin renders slowly and the fat under it stays soft. 425°F is aggressive enough to render fat and crisp skin before the meat overcooks. If your oven runs hot, drop to 400°F, not lower.
Cooking straight from the fridge
Cold thighs on a hot rack means the outside browns before the inside catches up. Thirty minutes at room temp is enough — the surface warms, the meat cooks evenly, and 165°F arrives on schedule.
Trusting the clock over the thermometer
A 5-oz thigh and an 8-oz thigh can go in the same pan and finish 6 minutes apart. An $12 instant-read thermometer pays for itself the first time it saves you from serving pink meat or a dry roast. Probe the thickest part, don’t touch bone.

Storage, Reheating, and Meal Prep
Cooked thighs keep 3–4 days in an airtight container in the fridge, per FoodSafety.gov. Freeze up to 4 months in a zip-top bag with the air pressed out. Skin will lose its crackle in the fridge — that’s physics, not your fault.
To reheat and get some crispness back: 375°F oven on a wire rack, 12–15 minutes for whole thighs, uncovered. Microwave works for chopped thigh in a rice bowl but murders skin. For shredding into tacos, salads, or grain bowls, remove the skin first — nobody misses it in a wrap.
How to Tell When Chicken Thighs Are Done Without a Thermometer
Best answer: buy the thermometer. Failing that, three visual cues stack the odds: (1) juices at the deepest joint run clear, not pink or cloudy; (2) skin has pulled back from the drumstick end, exposing about ⅛ inch of bone; (3) a fork slides in with almost no resistance. Any two of the three usually means you’re safe. All three means you’re past safe — and thighs, being thighs, are still going to taste great.
Related Recipes to Cook Next
Once you’ve got the timing memorized, the same base method opens up a dozen weeknight dinners. If you liked this write-up, our temperature guide for fried chicken covers the same “fat + heat + patience” logic for the stovetop, and the chicken and heavy cream collection has five sauces built specifically for boneless thighs.
Did You Try Our Recipe ?
Chicken hears and gizzards
I would love you to send me the recipe please. I have no printer to print it off. [email protected]
Response from MeatRecipesBox
Hi Sharon, thank you so much for your kind words! I’ve just sent the full recipe to your inbox. Enjoy, and let me know how it turns out! 😊
Scrumptious
My husband (who is extremely picky) loved the liver & onions so much!! I didn’t have any beef broth or Sherry so I used about a tbl of Worcestershire and 1/4 c of white wine …..it was scrumptious
Response from MeatRecipesBox
Oh wow, I’m so happy to hear that!! 😍 I love that you made it work with what you had on hand — Worcestershire and white wine sound like a delicious twist. So glad your husband enjoyed it, especially being picky! Thank you for sharing your version, it makes me smile knowing it turned out scrumptious!
This was amazing
This recipe turned out really amazing! It’s juicy and spiced deliciously. I definitely would use less of the spicy pepper next time, but it really was delicious and I don’t think I’ll make chicken legs any other way from now on.!
Response from MeatRecipesBox
Thank you for taking the time to leave such a thoughtful review. I’m really glad to hear the recipe turned out juicy and full of flavor for you. That’s exactly what I was hoping for when putting it together. Good call on the spicy pepper as well. Adjusting the heat level to your own taste is always the best approach, and using a little less next time should make it just right for you. I really appreciate you trying the recipe and sharing your experience. It’s great to know it worked so well for you.
I Didn’t Expect This Cornbeef Hash Recipe to Taste This Good!!
One skillet. A handful of simple ingredients. Thirty minutes on the clock. And somehow… I ended up with the crispiest, most comforting cornbeef hash recipe I’ve made in years.
I wasn’t expecting much—just a quick, no-fuss meal. But that first bite? Crispy edges, tender potatoes, smoky corned beef, a little kick of pepper. It tasted like something straight off a cozy diner griddle.
Honestly, it caught me off guard—in the best way. Here’s why this simple skillet completely won me over.


