

Chinese honey garlic chicken is what happens when you want takeout and don’t want to wait for a driver. The chicken shatters when you bite it, the sauce is sticky and glossy without being cloying, and the whole thing lands on the table in 30 minutes flat. The secret is a double cornstarch coating and a sauce that finishes in the same pan.

Cube chicken thighs, toss with cornstarch, fry in batches for 4 minutes per batch until deep golden and crisp. Whisk the honey garlic sauce (honey, soy, garlic, rice vinegar, cornstarch slurry), simmer 90 seconds until it thickens and coats a spoon, toss the crispy chicken in for 60 seconds off the heat. Chicken safe at 165°F / 74°C. Feeds 4.
Jump to a section
Ingredients, grouped by pan
Everything on the counter before the oil goes on. Coating in one bowl, sauce in a mug, chicken cubed and dry. The whole recipe runs on prep because once the oil hits 350°F the pace does not slow down.
Chicken
- 1.5 lb boneless skinless chicken thighs, cut in 1-inch cubes
- 1 tsp kosher salt
- ½ tsp black pepper
- 1 tsp toasted sesame oil
Crispy coating
- ½ cup cornstarch
- 2 tbsp all-purpose flour
- 1 large egg, beaten
- 2 cups neutral oil for frying (canola, avocado)
Honey garlic sauce
- ⅓ cup honey
- 3 tbsp low-sodium soy sauce
- 2 tbsp rice vinegar
- 5 garlic cloves, minced fine
- 1 tsp fresh ginger, grated
- 1 tsp toasted sesame oil
- 1 tbsp cornstarch dissolved in 2 tbsp cold water
- Sesame seeds and sliced scallions for garnish
How to Make Crispy Chinese Honey Garlic Chicken
The order matters. Fry first while the sauce sits raw, then reduce the sauce fast and toss. If the chicken sits in sauce too long the coating goes soggy, so this is a one-minute finish.
- Season the chickenPat chicken cubes dry with paper towels, this is non-negotiable for crispness. Toss with salt, pepper, and sesame oil in a large bowl. Let sit 5 minutes while you prep the coating.
- Coat the chickenBeat the egg in a shallow bowl. Whisk cornstarch and flour in another. Dip each cube in egg, drop in the cornstarch bowl, roll to coat fully. Set on a plate in a single layer, do not stack.
- Heat the oilPour oil into a deep skillet or wok, heat over medium-high to 350°F / 175°C. Test with a piece of coating: it should bubble immediately and float within 5 seconds. Too cold and the chicken soaks oil, too hot and the outside burns before the inside cooks.
- Fry in two batchesDrop half the chicken into the oil, don’t crowd. Fry 4 minutes total, turning once at the 2-minute mark, until deep golden and shattering-crisp. Transfer to a wire rack. Repeat with the second batch. Rest chicken on the rack, not on paper towel (paper towels trap steam and soften the crust).
- Build the saucePour out all but 1 tsp of frying oil. Return the pan to medium heat, add the garlic and ginger, stir for 20 seconds until fragrant but not brown. Pour in honey, soy sauce, rice vinegar. Bring to a simmer.
- Thicken and tossWhisk the cornstarch slurry, add it to the sauce. It thickens to a glossy glaze in 30 seconds. Kill the heat. Add the crispy chicken, drizzle sesame oil, toss for 60 seconds until every piece is coated. Move fast, the sauce grabs the crust.
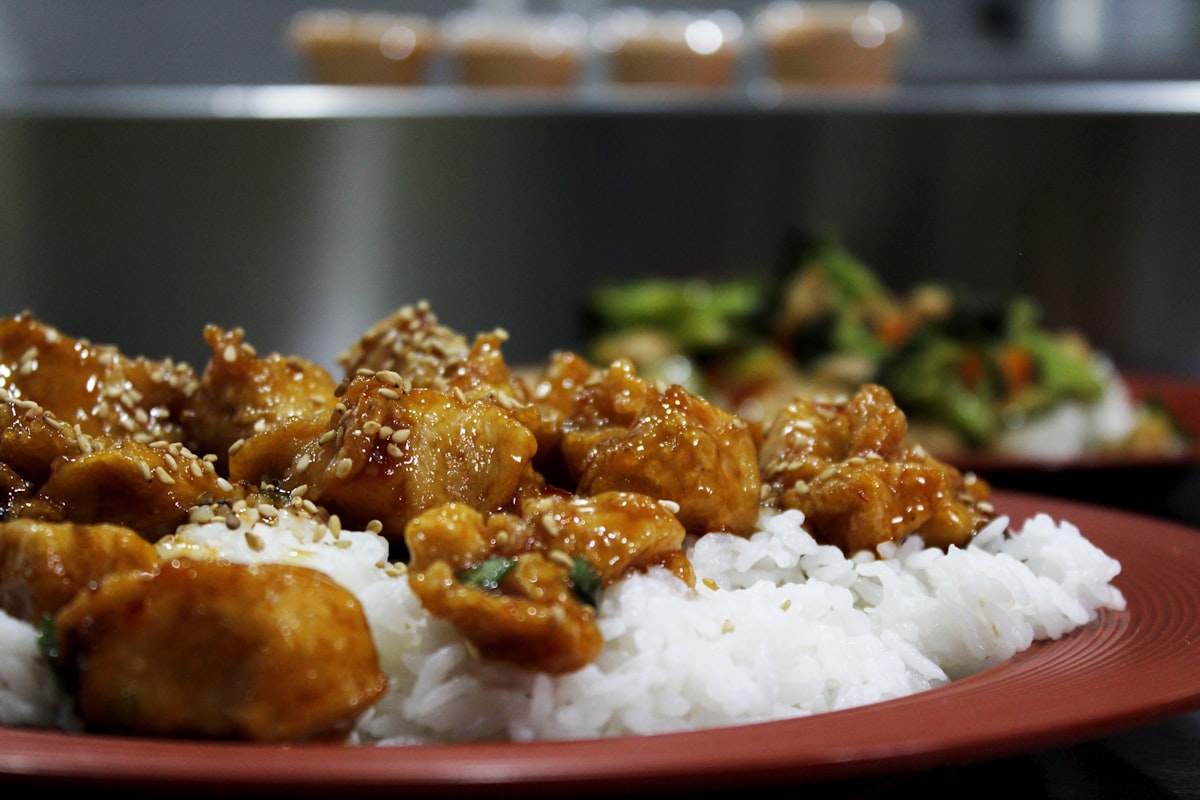
- Finish and serveSlide onto a warm platter. Scatter sesame seeds and scallions. Serve immediately over rice, the crust starts softening after 5 minutes so don’t hold it.
The Honey Garlic Sauce Ratio
Every ingredient in the sauce does one job. Change the ratio and the sauce goes flat, too sweet, or slides off the chicken. This is the version I’ve landed on after four rounds of testing.
| Ingredient | Amount (per 4 servings) | What it does |
|---|---|---|
| Honey | ⅓ cup | Sweetness and gloss. Use raw or clover, not manuka (too grassy). |
| Low-sodium soy sauce | 3 tbsp | Salt and umami counterweight to the honey. Regular soy makes it aggressive. |
| Rice vinegar | 2 tbsp | Cuts sweetness and lifts the finish. Do not swap for white vinegar. |
| Garlic (fresh) | 5 cloves | Named ingredient, so use fresh. Jarred garlic tastes tinny in this sauce. |
| Ginger (fresh) | 1 tsp grated | Warm background. Ground ginger works but flattens the top notes. |
| Cornstarch slurry | 1 tbsp + 2 tbsp water | Turns the sauce into a glossy glaze that clings instead of pooling. |
Why the Coating Stays Crispy After Saucing
Most homemade sticky chicken goes soggy the second it touches the sauce. Three details keep this one crispy through the plate:
Double cornstarch
Egg wash first, then cornstarch. The egg glues the starch to the chicken, the starch fries into a rigid glass shell. Flour alone won’t do this.
Wire rack rest
Set fried chicken on a wire rack, never paper towel. Paper towels trap steam and turn the underside to mush within 2 minutes.
Toss off heat
Kill the burner before adding chicken to the sauce. Direct heat pushes moisture from the sauce into the crust and destroys it. Residual heat is enough.
Serve immediately
Coating stays crisp for 4 to 5 minutes after tossing. Plate straight from the pan. If serving family style, sauce the chicken tableside.
What to Serve With Chinese Honey Garlic Chicken
This dish is sweet, glossy, and rich. Pair it with something plain to give your palate a rest between bites, plus one green vegetable for balance and color contrast on the plate.
- Jasmine rice or short-grain white rice. The sauce needs something neutral to catch it. Brown rice works but shifts the flavor toward nutty.
- Steamed broccoli or bok choy. Steam 4 minutes until bright green. A squeeze of lemon and a splash of soy is all the seasoning it needs.
- Cucumber salad. Smash a cucumber with the flat of a knife, salt for 10 minutes, dress with rice vinegar and sesame oil. Cuts through the sauce.
- Fried rice. If you want a bigger meal, our 15-minute Chinese chicken noodles uses the same soy-ginger base and rounds out a takeout-style spread.
- Kung Pao chicken for a spicy contrast. Serve alongside kung pao chicken when you’re feeding a group and want sweet plus spicy on the same table.
Common Mistakes That Ruin the Crisp
Storage and Reheating
FAQ
What is Chinese honey garlic chicken sauce made of?
Honey, low-sodium soy sauce, rice vinegar, fresh garlic, ginger, and a cornstarch slurry to thicken. Sesame oil goes in at the very end for aroma. Skip any recipe that uses ketchup or ground ginger, they change the profile completely.
Can I bake chinese honey garlic chicken instead of frying?
Yes. Toss coated chicken with 2 tbsp oil, spread on a wire rack over a sheet pan, bake at 425°F for 22 minutes flipping once. Crust is less shattering than the fried version but still crispy enough to hold the sauce.
Is chinese honey garlic chicken spicy?
No, it’s sweet and garlicky with zero heat by default. Add 1 tsp sambal or ½ tsp red pepper flakes to the sauce if you want a mild kick. Doubling either makes it noticeably spicy.
Can I use chicken breast instead of thighs?
You can, but the result is drier. Cut breast into smaller cubes (¾ inch) and fry for 3 minutes only, not 4. Chicken breast crosses 165°F / 74°C fast and turns rubbery if you overshoot.
How do I make it gluten-free?
Swap all-purpose flour in the coating for extra cornstarch (½ cup cornstarch total, no flour). Use tamari or gluten-free soy sauce. Verify your rice vinegar label, most are naturally gluten-free.
What’s the difference between honey garlic and general tso’s chicken?
Honey garlic is sweet and garlicky with rice vinegar tang. General Tso’s is sweet-sour-spicy with dried chilies and a heavier sauce coating. Same fried chicken base, different sauce personality.
Can I make the sauce ahead?
Whisk the sauce (minus the slurry) up to 3 days ahead. Add the cornstarch slurry only when the sauce hits the pan, otherwise it separates in the fridge and clumps when reheated.
Save this recipe for your next takeout night
Pin it so the 30-minute formula is one click away when the delivery app tempts you.
Pin to PinterestCrispy Chinese Honey Garlic Chicken (30-Minute Better-Than-Takeout Recipe)
A 30-minute recipe for crispy and sticky Chinese honey garlic chicken, with a double cornstarch coating and a sweet and garlicky sauce.
- 1.5 lb boneless skinless chicken thighs Cut into 1-inch cubes
- 1 tsp kosher salt
- 0.5 tsp black pepper
- 1 tsp toasted sesame oil
- 0.5 cup cornstarch
- 2 tbsp all-purpose flour
- 1 large egg Beaten
- 2 cups neutral oil For frying (canola or avocado oil)
- 0.33 cup honey
- 3 tbsp low-sodium soy sauce
- 2 tbsp rice vinegar
- 5 cloves garlic Minced fine
- 1 tsp fresh ginger Grated
- 1 tbsp cornstarch Dissolved in 2 tbsp cold water
- 1 tsp toasted sesame oil
- sesame seeds
- sliced scallions
Prepare the Chicken
Pat chicken cubes dry with paper towels.
Toss with salt, pepper, and sesame oil in a large bowl.
Let sit 5 minutes while you prep the coating.
Coat the Chicken
Beat the egg in a shallow bowl.
Whisk cornstarch and flour in another bowl.
Dip each cube in egg, drop in the cornstarch bowl, roll to coat fully.
Set on a plate in a single layer, do not stack.
Fry the Chicken
Heat oil in a deep skillet or wok to 350°F.
Fry chicken in batches for 4 minutes, turning once at the 2-minute mark.
Transfer to a wire rack.
Make the Sauce
Pour out all but 1 tsp of frying oil.
Return the pan to medium heat, add garlic and ginger, stir for 20 seconds.
Pour in honey, soy sauce, rice vinegar, and bring to a simmer.
Whisk the cornstarch slurry, add it to the sauce.
Thicken the sauce for 30 seconds.
Finish and Serve
Add the crispy chicken to the sauce, toss for 60 seconds.
Slide onto a warm platter, scatter sesame seeds and scallions.
Serve immediately over rice.
- Deep skillet or wok
- Wire rack
- Sheet pan
Serve immediately over rice to preserve the crispy coating.
Did You Try Our Recipe ?
Scrumptious
My husband (who is extremely picky) loved the liver & onions so much!! I didn’t have any beef broth or Sherry so I used about a tbl of Worcestershire and 1/4 c of white wine …..it was scrumptious
Response from MeatRecipesBox
Oh wow, I’m so happy to hear that!! 😍 I love that you made it work with what you had on hand — Worcestershire and white wine sound like a delicious twist. So glad your husband enjoyed it, especially being picky! Thank you for sharing your version, it makes me smile knowing it turned out scrumptious!
This was amazing
This recipe turned out really amazing! It’s juicy and spiced deliciously. I definitely would use less of the spicy pepper next time, but it really was delicious and I don’t think I’ll make chicken legs any other way from now on.!
Response from MeatRecipesBox
Thank you for taking the time to leave such a thoughtful review. I’m really glad to hear the recipe turned out juicy and full of flavor for you. That’s exactly what I was hoping for when putting it together. Good call on the spicy pepper as well. Adjusting the heat level to your own taste is always the best approach, and using a little less next time should make it just right for you. I really appreciate you trying the recipe and sharing your experience. It’s great to know it worked so well for you.
I Didn’t Expect This Cornbeef Hash Recipe to Taste This Good!!
One skillet. A handful of simple ingredients. Thirty minutes on the clock. And somehow… I ended up with the crispiest, most comforting cornbeef hash recipe I’ve made in years.
I wasn’t expecting much—just a quick, no-fuss meal. But that first bite? Crispy edges, tender potatoes, smoky corned beef, a little kick of pepper. It tasted like something straight off a cozy diner griddle.
Honestly, it caught me off guard—in the best way. Here’s why this simple skillet completely won me over.


