

- Parboil peppers 3 minutes before stuffing — raw peppers stay too crunchy after baking ([Serious Eats](https://www.seriouseats.com/), 2023).
- Use 80/20 ground beef — leaner mixes dry out; fattier bleeds too much grease into the pepper.
- One stuffed pepper delivers 410 calories and 32g protein — a complete meal on its own.
- Freezes cooked for up to 3 months per USDA FSIS ground beef storage guidance.
Which Bell Peppers Are Best for Stuffing?
Red, yellow, and orange bell peppers taste sweeter and hold their shape better than green ones, which stay grassy after baking. According to a 2023 The Kitchn comparison test, cooked green peppers score lowest on both flavor and structural integrity, while red peppers ripen longer on the vine and carry roughly 11 times more beta-carotene. Pick peppers with flat bottoms so they sit upright in the baking dish.

Do You Need to Cook the Rice First?
Yes. Uncooked rice in a stuffed pepper stays hard even after 40 minutes at 375°F. It doesn’t absorb enough moisture to hydrate fully. Use fully cooked rice — leftover white rice from yesterday works perfectly. In fact, day-old rice holds together better than freshly steamed, which turns mushy when mixed with hot beef and marinara.
For a lower-carb version, swap the rice for cauliflower rice (uncooked is fine — it releases enough water to soften during baking). For a higher-fiber version, use brown rice or quinoa. Both need to be pre-cooked before mixing into the filling.
Watch: The Full Recipe from Prep to Plate
Some steps read easier than they cook. This one covers the pepper-hollowing motion, the parboil timing, and the layering order that keeps everything cheesy on top without soggy bottoms.
The Full Recipe (Makes 6 Stuffed Peppers)
Ingredients
Peppers:
- 6 large bell peppers (red, yellow, or orange — mix for color)
- 1 tbsp olive oil for the baking dish
Beef & rice filling:
- 1 lb 80/20 ground beef
- 1 cup cooked long-grain white rice (day-old preferred)
- 1 medium yellow onion, finely diced
- 3 garlic cloves, minced
- 1 cup marinara sauce (plus ½ cup for the pan)
- 1 tsp dried oregano, 1 tsp dried basil, ½ tsp red pepper flakes
- 1½ tsp salt, ½ tsp black pepper
- 1 tbsp Worcestershire sauce (secret depth)
- ¼ cup grated Parmesan (mixed into filling)
Topping:
- 1½ cups shredded mozzarella
- Fresh parsley or basil, chopped, for serving
Step-by-Step Instructions
- Preheat oven to 375°F (190°C). Grease a 9×13 baking dish with olive oil. Spread the extra ½ cup marinara across the bottom — it insulates the peppers and adds flavor from below.
- Prep the peppers. Slice off the tops (save them if you want lids). Scoop out ribs and seeds. Bring a large pot of salted water to a boil.
- Parboil. Drop peppers into boiling water for exactly 3 minutes. Remove with tongs, invert onto paper towels to drain. This step is non-negotiable — skip it and your peppers stay raw and squeaky.
- Brown the beef. In a large skillet over medium-high heat, cook onion in 1 tbsp oil for 3 minutes. Add ground beef, break apart, cook 6-8 minutes until no pink remains. Drain excess fat if there’s more than 2 tbsp.
- Build the filling. Off heat, stir in garlic, cooked rice, 1 cup marinara, oregano, basil, red pepper flakes, salt, pepper, Worcestershire, and Parmesan. Taste and adjust salt.
- Stuff generously. Stand peppers upright in the baking dish. Fill each to overflowing — the filling shrinks slightly. Top with a heap of mozzarella.
- Bake covered. Cover the dish with foil, bake 30-35 minutes. Peppers should feel tender when pierced with a knife but still hold shape.
- Uncover and finish. Remove foil, bake another 5-7 minutes until cheese is bubbling and lightly golden. Rest 5 minutes before serving — the filling firms up.
How to Store, Freeze, and Reheat
Cooked stuffed peppers keep 3-4 days refrigerated in an airtight container, per USDA food-safety guidance for cooked ground beef. They also freeze exceptionally well — arguably better than most casseroles because the pepper walls act as portion-controlled containers.
- Freeze cooked: Wrap each pepper individually in foil, then bag. Freezes 3 months. Thaw overnight in fridge, reheat covered at 350°F for 20 min.
- Freeze uncooked: Assemble but do not bake. Freeze in the dish, wrap tightly. Bake from frozen at 375°F for 60-70 min covered, 10 min uncovered.
- Reheat single portion: Microwave at 70% power for 3 min, then 30-second bursts. Full-power microwaving overheats the cheese and toughens the pepper skin.
- Meal-prep angle: Batch 12 peppers on Sunday, freeze 6 assembled and refrigerate 6 cooked. Enough dinner variety for two weeks. See our high-protein meal prep guide for scaling strategies.
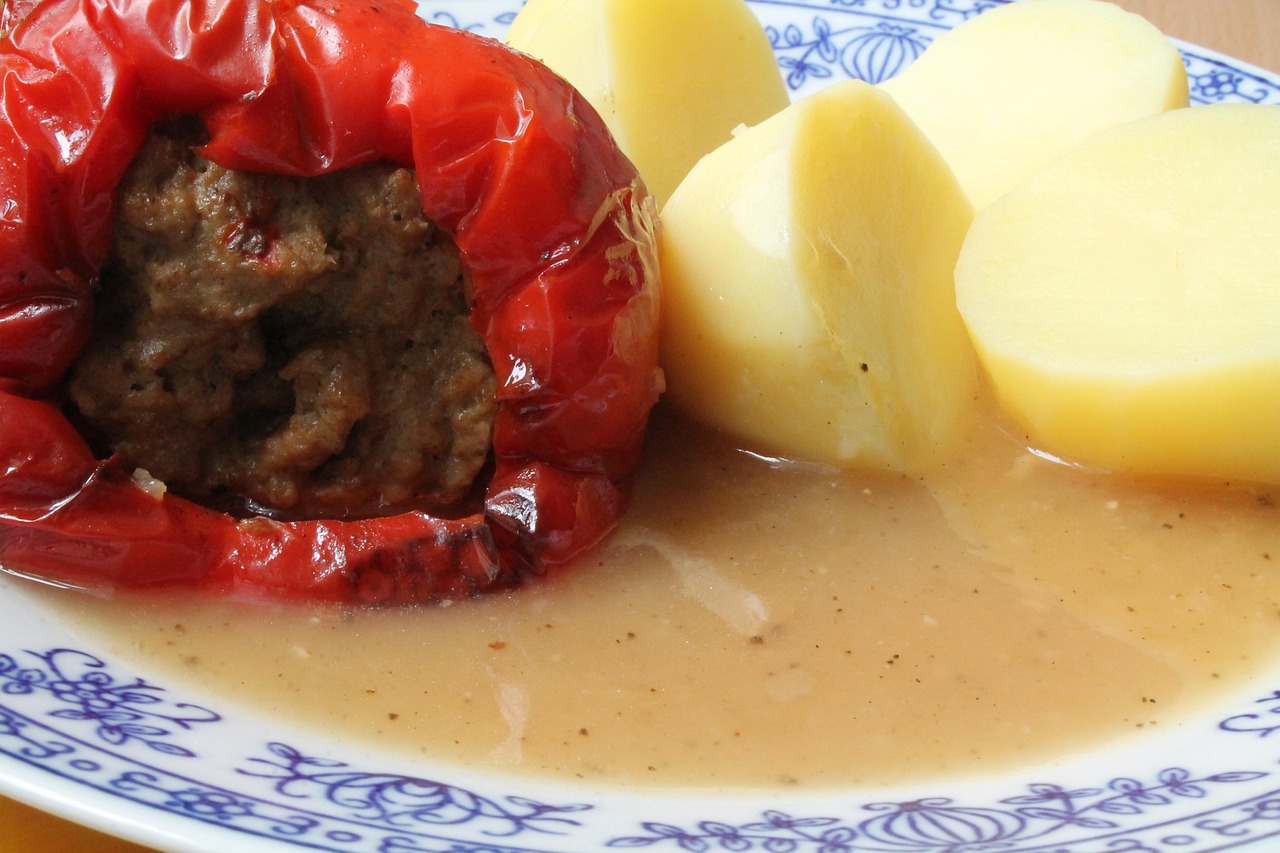
Variations Worth Trying
- Italian-style (as above): Marinara, oregano, mozzarella, Parmesan.
- Mexican twist: Swap marinara for salsa, add ½ cup black beans and 1 tsp cumin, top with pepper jack and cilantro.
- Greek-inspired: Sub ground lamb for beef, add ¼ cup crumbled feta and 2 tbsp fresh dill, skip the mozzarella.
- Low-carb (keto): Replace rice with cauliflower rice. Drops carbs from 28g to about 10g per pepper.
- Turkey and quinoa: Sub ground turkey for beef, quinoa for rice. Higher protein (36g), lower fat (11g). See our ground turkey recipe collection.
- Vegetarian: Skip beef, use 2 cups cooked lentils plus 1 cup mushrooms, sautéed. Full details in our vegetarian stuffed peppers guide.
Common Mistakes That Ruin Stuffed Peppers
- Skipping the parboil: Raw peppers need 60+ minutes to soften. Parboiling for 3 minutes cuts oven time in half and gives even tenderness.
- Under-seasoning the beef: The pepper is bland by itself. Salt the filling more aggressively than you would a burger.
- Overstuffing without a dish liner: Filling overflows and burns onto the pan. Spread marinara underneath as a buffer.
- Adding cheese too early: Cheese added at the start burns and turns leathery. Add halfway through, or top and switch to uncovered for the last 7 minutes.
- Using lean ground beef only: 93/7 dries out. 80/20 keeps moisture and flavor. Drain the excess fat instead.
Frequently Asked Questions
Do I have to parboil the peppers before stuffing?
Yes, if you want tender peppers in 40 minutes. Raw peppers stuffed and baked need at least 60-70 minutes to soften, and the filling overcooks by then. A 3-minute boil pre-softens the walls without collapsing them. Some cooks microwave 4 minutes instead.
Can I make stuffed peppers ahead of time?
Yes. Assemble up to 24 hours ahead and refrigerate, covered. Add 5-10 minutes to bake time since they’ll be starting cold. For longer storage, freeze uncooked for up to 3 months per USDA storage guidelines for cooked ground beef mixtures.
What can I use instead of rice?
Cauliflower rice (raw), cooked quinoa, cooked farro, cooked orzo, or cooked couscous all work. For keto or paleo diets, use cauliflower rice, chopped mushrooms, or riced broccoli. Skip pasta shapes — they overcook and turn gummy inside the pepper.
How do I know when stuffed peppers are done?
The peppers should pierce easily with a paring knife but still hold shape. Internal filling temp should hit 160°F for ground beef safety, per USDA guidance. The cheese on top should be fully melted with light golden spots. Total bake time: 35-45 minutes at 375°F.
Can I use ground turkey or chicken instead of beef?
Yes. Ground turkey (93/7) works with a splash of olive oil to compensate for lower fat, adding about 4g protein per serving. Ground chicken is milder — bump the herbs by 25% and add 1 extra tsp Worcestershire. Both cook in the same time as beef.
What to Serve Alongside
Stuffed peppers are a complete meal, but a light side balances the richness. A simple tomato basil soup starts the meal, or a crisp Caesar salad works as a bright contrast. For a heartier plate, add crusty garlic bread or roasted potatoes.
Building a comfort-food rotation? Browse our one-pan dinner recipes — 20+ weeknight-friendly meals that hit 30g+ protein.
Nutrition calculated via USDA FoodData Central. Food-safety guidance sourced from USDA FSIS. Pepper variety comparison referenced from The Kitchn testing (2023).
Did You Try Our Recipe ?
Scrumptious
My husband (who is extremely picky) loved the liver & onions so much!! I didn’t have any beef broth or Sherry so I used about a tbl of Worcestershire and 1/4 c of white wine …..it was scrumptious
Response from MeatRecipesBox
Oh wow, I’m so happy to hear that!! 😍 I love that you made it work with what you had on hand — Worcestershire and white wine sound like a delicious twist. So glad your husband enjoyed it, especially being picky! Thank you for sharing your version, it makes me smile knowing it turned out scrumptious!
This was amazing
This recipe turned out really amazing! It’s juicy and spiced deliciously. I definitely would use less of the spicy pepper next time, but it really was delicious and I don’t think I’ll make chicken legs any other way from now on.!
Response from MeatRecipesBox
Thank you for taking the time to leave such a thoughtful review. I’m really glad to hear the recipe turned out juicy and full of flavor for you. That’s exactly what I was hoping for when putting it together. Good call on the spicy pepper as well. Adjusting the heat level to your own taste is always the best approach, and using a little less next time should make it just right for you. I really appreciate you trying the recipe and sharing your experience. It’s great to know it worked so well for you.
I Didn’t Expect This Cornbeef Hash Recipe to Taste This Good!!
One skillet. A handful of simple ingredients. Thirty minutes on the clock. And somehow… I ended up with the crispiest, most comforting cornbeef hash recipe I’ve made in years.
I wasn’t expecting much—just a quick, no-fuss meal. But that first bite? Crispy edges, tender potatoes, smoky corned beef, a little kick of pepper. It tasted like something straight off a cozy diner griddle.
Honestly, it caught me off guard—in the best way. Here’s why this simple skillet completely won me over.

Emma Delacourt
Recipe Developer & Founder, MeatRecipesBox
Emma has been developing and testing meat recipes since 2019. She focuses on temperature precision, food science, and making restaurant-quality results accessible for home cooks. Every recipe on this site is tested multiple times before publishing.


