


The reverse sear technique — popularized in home kitchens by J. Kenji López-Alt’s Serious Eats writeup — turns a thick, expensive tomahawk into something you’d pay $90 for at a steakhouse, on a Tuesday, without any bar of guesswork. This guide sticks to the numbers that matter and skips the fluff.
Temperature & Time Chart
The whole method lives or dies on internal temperature — not the clock. Weight changes timing more than most guides admit. Use a probe thermometer and pull at the numbers below, not by feel. ThermoWorks’ data on carryover cooking matches what we’ve measured on our own grill.
| Steak weight | Oven/smoker @ 225°F | Pull temp | Sear time (each side) | Final temp |
|---|---|---|---|---|
| 1.5 lb (700 g) | 40–50 min | 115°F / 46°C | 60 sec | 130°F / 54°C |
| 2 lb (900 g) | 55–65 min | 115°F / 46°C | 75 sec | 132°F / 55°C |
| 2.5 lb (1.1 kg) | 65–80 min | 115°F / 46°C | 90 sec | 133°F / 56°C |
| 3 lb (1.4 kg) | 80–95 min | 115°F / 46°C | 90–120 sec | 135°F / 57°C |
Why 115°F? The steak carries over roughly 5–8°F during the sear plus another 3–5°F while resting. Pulling at 115°F lands you dead-center medium-rare after the crust forms. If you prefer a leaner cut for weeknight cooking, our complete guide to cooking top round steak uses the same probe-first logic.
What You Need
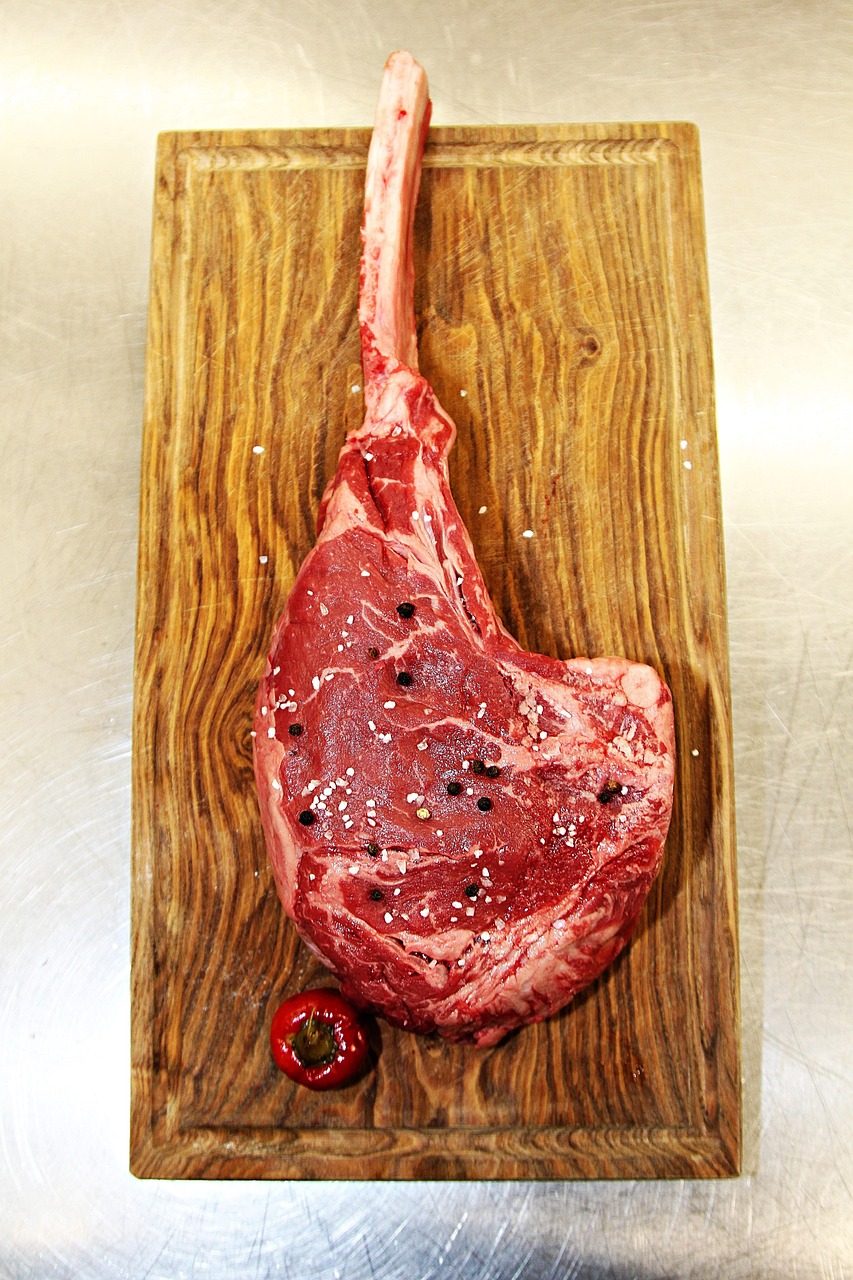
Ingredients (serves 2–3)
- 1 tomahawk ribeye, 2 to 2.5 lb (about 2 inches thick)
- 1.5 tsp kosher salt (Diamond Crystal) — or ¾ tsp Morton’s
- 1 tsp coarse black pepper
- 1 tbsp neutral high-smoke-point oil (grapeseed, avocado, or refined beef tallow)
- 2 tbsp unsalted butter
- 3 garlic cloves, smashed
- 2 sprigs fresh thyme or rosemary
Gear
- Instant-read probe thermometer (non-negotiable — see ThermoWorks Thermapen ONE)
- Wire rack over a sheet pan, or a smoker/grill with indirect zone
- 12-inch cast-iron skillet or a grill you can push past 600°F
The Method, Step by Step
Reverse searing flips the usual order: gentle heat first to bring the whole cut to temperature evenly, then a short burst of extreme heat for the crust. On a thick tomahawk it’s the difference between a rosy, edge-to-edge interior and the gray “bullseye” band a hot pan alone will give you. The science behind why is covered in depth on Meathead Goldwyn’s AmazingRibs breakdown.
- Dry-brine 40 minutes ahead. Pat the steak dry, salt both sides generously, and rest it uncovered on a rack. The surface will look tacky — that’s the salt pulling moisture out and back in. Dry surface = better crust.
- Preheat low. Set an oven, smoker, or grill’s indirect zone to 225°F (107°C). Add pepper to the steak now; earlier and it can scorch during the sear.
- Slow-roast to 115°F internal. Place the steak on a wire rack, probe inserted into the thickest part avoiding the bone. Check the temp starting at 45 minutes. A 2 lb tomahawk usually lands in the 55–65 minute window.
- Rest briefly and crank the heat. Pull the steak, tent loosely with foil, and get your cast iron ripping hot — smoke coming off the oil hot. Or push your grill to 600°F+ with the lid open.
- Sear 60–90 seconds per side. Add oil, then the steak. Do not move it. Flip once, sear the other side, then use tongs to sear the fat cap edge for 20–30 seconds. Total time under intense heat: under 4 minutes.
- Baste, briefly. Drop butter, garlic, and thyme into the pan. Tilt and spoon the foamy butter over the top for the last 30 seconds. Skip if you’re on a grill.
- Rest 10 full minutes. This isn’t optional on a two-inch cut. Slice against the grain in ½-inch strips, keeping a few pieces on the bone for the table.

Watch the method in action
Doneness Guide (Pull Temps)
The pull temperatures below already account for carryover from the sear and the rest. Trust the thermometer, not the timer. For food-safety context, the USDA FSIS safe-temperature chart lists 145°F as the minimum recommended internal for whole beef cuts with a 3-minute rest.
| Doneness | Pull from low heat | Final after sear + rest | Color |
|---|---|---|---|
| Rare | 105°F / 40°C | 120–125°F / 49–52°C | Cool red center |
| Medium-rare ⭐ | 115°F / 46°C | 130–135°F / 54–57°C | Warm red center |
| Medium | 125°F / 52°C | 140–145°F / 60–63°C | Warm pink center |
| Medium-well | 135°F / 57°C | 150–155°F / 65–68°C | Faint pink |
Reverse Sear vs. Sear-and-Roast: Which Wins?
Sear-first works fine for a ¾-inch strip. On a two-inch tomahawk it produces a thick gray band under the crust because heat has time to bleed inward while the outside colors. Reverse searing keeps the interior below the graying threshold (roughly 140°F) until the last 90 seconds, so the whole cross-section stays the same shade of pink. The crust is also crisper — a dry, warm surface browns faster than a cold, damp one. Same principle we apply on our grilled beef chuck: dry surface, hot fire, single flip.


Common Mistakes That Ruin It
Skipping the dry brine
An unsalted steak has surface water that turns into steam the moment it hits the pan — you get a pale, patchy crust instead of a mahogany one. Even 40 minutes of salt on a rack changes the result. Serious Eats’ Food Lab tests confirm the difference is visible in seconds during the sear.
Searing at “hot enough” instead of ripping hot
If the pan isn’t smoking, the sear will take 3–4 minutes per side and the interior overshoots. A tomahawk needs a pan hot enough that oil shimmers and moves like water within seconds.
Cutting into it too soon
Slicing at minute five dumps juices onto the board. Ten minutes of rest lets the muscle fibers relax and hold the moisture where it belongs.
Trusting time over temperature
Two tomahawks of the same weight can differ by 10 minutes depending on shape, fat cap, and starting temp. The probe is the only honest signal.
Common Questions
How long does a 2 lb tomahawk take to reverse sear?
Plan on roughly 75 minutes total: 55–65 minutes at 225°F to hit 115°F internal, 3–4 minutes for the sear, and 10 minutes of rest. Larger cuts add roughly 10 minutes per additional half pound.
Do I need a smoker or can I use the oven?
A home oven at 225°F works perfectly for the low phase — you’ll miss the smoke flavor but the texture is identical. Add a few drops of liquid smoke to the butter baste if you want that note.
Should the steak come to room temperature first?
No. Because the low-heat phase already gently warms the interior, pulling the steak straight from the fridge is fine and actually gives you a longer window before the outside overcooks — a finding also documented by Cook’s Illustrated in their tempering tests.
Can I reverse sear a frozen tomahawk?
Yes, and it works surprisingly well. Add roughly 50% more time in the low-heat phase and check with the probe starting at 90 minutes. The frozen center resists overcooking during the sear.
What’s the best pan for the sear if I don’t have cast iron?
Carbon steel or a heavy stainless-clad skillet both work. Avoid nonstick — the coating breaks down above 500°F and won’t build a real crust.
Serve It With
A tomahawk is rich, so pair it with something with acid or bite: a lemony arugula salad, blistered shishito peppers, or a sharp chimichurri. Skip the heavy starch — one plate of this steak is already the meal. If you’ve got leftovers, thin-slice them cold onto a sandwich the next day, the same way we build our loaded steak sub. Looking for a budget alternative when tomahawk isn’t in the cards? Our top round steak recipes and oven-braised round steak deliver serious flavor for a third of the price.
Did You Try Our Recipe ?
Chicken hears and gizzards
I would love you to send me the recipe please. I have no printer to print it off. [email protected]
Response from MeatRecipesBox
Hi Sharon, thank you so much for your kind words! I’ve just sent the full recipe to your inbox. Enjoy, and let me know how it turns out! 😊
Scrumptious
My husband (who is extremely picky) loved the liver & onions so much!! I didn’t have any beef broth or Sherry so I used about a tbl of Worcestershire and 1/4 c of white wine …..it was scrumptious
Response from MeatRecipesBox
Oh wow, I’m so happy to hear that!! 😍 I love that you made it work with what you had on hand — Worcestershire and white wine sound like a delicious twist. So glad your husband enjoyed it, especially being picky! Thank you for sharing your version, it makes me smile knowing it turned out scrumptious!
This was amazing
This recipe turned out really amazing! It’s juicy and spiced deliciously. I definitely would use less of the spicy pepper next time, but it really was delicious and I don’t think I’ll make chicken legs any other way from now on.!
Response from MeatRecipesBox
Thank you for taking the time to leave such a thoughtful review. I’m really glad to hear the recipe turned out juicy and full of flavor for you. That’s exactly what I was hoping for when putting it together. Good call on the spicy pepper as well. Adjusting the heat level to your own taste is always the best approach, and using a little less next time should make it just right for you. I really appreciate you trying the recipe and sharing your experience. It’s great to know it worked so well for you.
I Didn’t Expect This Cornbeef Hash Recipe to Taste This Good!!
One skillet. A handful of simple ingredients. Thirty minutes on the clock. And somehow… I ended up with the crispiest, most comforting cornbeef hash recipe I’ve made in years.
I wasn’t expecting much—just a quick, no-fuss meal. But that first bite? Crispy edges, tender potatoes, smoky corned beef, a little kick of pepper. It tasted like something straight off a cozy diner griddle.
Honestly, it caught me off guard—in the best way. Here’s why this simple skillet completely won me over.


