

What’s the Actual Difference?
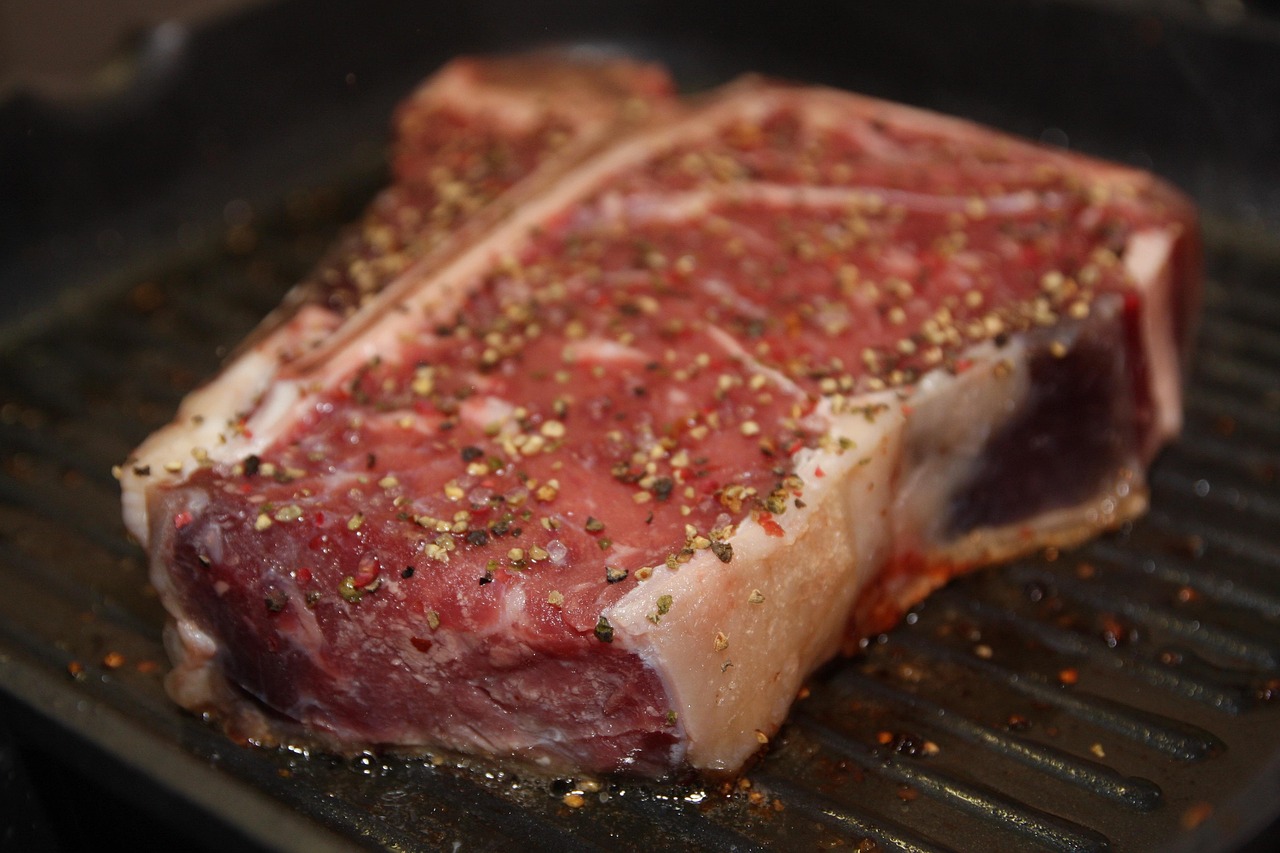
Both cuts are cross-sections of the short loin, taken from the back of the cow just behind the ribs. They contain two premium muscles separated by a bone: the strip loin (New York strip) on one side, the tenderloin (filet mignon) on the other. What changes is where along the loin the butcher cuts. Move toward the rear and the tenderloin gets wider — that’s the porterhouse. Cut closer to the front and the tenderloin narrows to a strip — that’s the T-bone. The Beef Cuts database from the Cattlemen’s Beef Board maps this exactly.
| Porterhouse | T-Bone | |
|---|---|---|
| Tenderloin width | ≥ 1.25 in (32 mm) | 0.5 – 1.24 in (13–31 mm) |
| Typical weight | 24–32 oz (680–900 g) | 16–24 oz (450–680 g) |
| Best for | Sharing (2 people) | Solo dinner |
| Price per lb (2026) | $22–$32 | $18–$26 |
| Cut from | Rear short loin | Front short loin |
Rule of thumb at the counter: if you can lay two fingers flat across the tenderloin section, it’s a porterhouse.
Why You Have to Cook Them Differently

The strip loin is a working muscle with dense fibers and meaningful marbling. It shines at 130–135°F — enough heat to render the fat but not so much it dries out. The tenderloin is the least-used muscle on the cow. Almost no fat, almost no connective tissue. Push it past 130°F and it goes from butter-soft to chalky in a hurry. That’s why serious cooks position a porterhouse with the tenderloin side over the cooler part of the grill, or angle the pan so the strip side gets more direct contact with the metal. Kenji López-Alt walks through the two-zone logic on Serious Eats if you want the deeper physics.
What You Need
Ingredients (serves 2 for porterhouse, 1 for T-bone)
- 1 porterhouse (24–28 oz) or T-bone (16–20 oz), 1.25 to 1.5 in thick
- 1 tsp kosher salt (Diamond Crystal) per pound of steak
- 1 tsp coarse black pepper
- 1 tbsp high-smoke-point oil (grapeseed, avocado, tallow)
- 2 tbsp unsalted butter
- 3 garlic cloves, smashed
- 2 sprigs fresh thyme or rosemary
Gear
- Instant-read probe thermometer — check both sides (Thermapen ONE is the standard)
- 12-inch cast-iron skillet or a two-zone grill setup
- Tongs — never a fork (piercing dumps juice)
The Method: Cast Iron (with Two-Zone Trick)
This is the version most home kitchens can execute cleanly. If you’re grilling, skip to the grill notes below step 6.
- Dry-brine 40 minutes ahead. Salt the steak on both sides, rest it uncovered on a rack. The surface will go tacky, then dry — that’s what you want for a real crust.
- Preheat the pan hard. Cast iron on high for 4–5 minutes until it’s smoking. Add oil, swirl once.
- Sear the strip side first. Lay the steak in so the strip loin side gets full pan contact. Angle the pan slightly on the burner if needed so the tenderloin edge sits off direct heat. Sear 90 seconds untouched.
- Flip and repeat. Same 90 seconds on the other side, still favoring the strip. Season with pepper at the flip.
- Drop the heat, add fat. Cut the burner to medium. Add butter, garlic, thyme. As it foams, tilt the pan and spoon the butter over the strip side aggressively; give the tenderloin only a light baste.
- Probe both sides. Pull when the tenderloin reads 125°F and the strip reads 130°F. If the tenderloin gets there first (it will), shield it with a folded piece of foil and keep basting the strip for another minute.
- Rest 8–10 minutes. Loosely tented. Carryover brings the strip to 132–135°F and the tenderloin to 128–130°F — right where each muscle wants to land.
- Carve off the bone. Run a sharp knife along the bone to release each muscle. Slice both against the grain, then reassemble the strips on the board around the bone for serving. That’s the steakhouse presentation.

Grill notes (if you’re not using a pan)
Set the grill for two zones: one side ripping hot (500°F+ direct), one side moderate (350°F indirect). Sear the strip side over the hot zone for 2 minutes per side. Then slide the steak so the tenderloin sits over the indirect zone while the strip stays over the hot zone. Finish by internal temperature, same targets as above.
Watch a master butcher cook one
Temperature Chart (Pull Temps)
The numbers below are pull temperatures — the steak will climb 3–5°F during the rest. For food-safety context, the USDA FSIS chart lists 145°F as the recommended safe minimum for whole muscle beef with a 3-minute rest; a properly seared steak reaches surface pasteurization on its way there.
| Doneness | Pull the strip at | Pull the tenderloin at | Final after rest |
|---|---|---|---|
| Rare | 120°F / 49°C | 115°F / 46°C | Cool red |
| Medium-rare ⭐ | 130°F / 54°C | 125°F / 52°C | Warm red |
| Medium | 140°F / 60°C | 135°F / 57°C | Warm pink |
| Medium-well | 150°F / 65°C | 145°F / 63°C | Faint pink |
Common Mistakes

Treating both sides the same
Pull the whole steak when the strip hits 130°F and the tenderloin is already at 140°F — overcooked and chalky. Two probes, two targets.
Skipping the two-zone setup on a grill
A single hot zone forces you to choose which side to protect. You end up moving the steak constantly and building an uneven crust. Two zones from the start solves it.
Under-salting
Porterhouse and T-bone are thick, dense cuts. A pinch of salt at the last second only seasons the surface. Dry-brining 40 minutes ahead lets salt penetrate the muscle for even seasoning — the AmazingRibs dry-brine breakdown shows why this matters.
Cutting on the bone
Slice against the grain after you’ve released the muscles from the bone. Cutting with the bone still attached forces you to work at bad angles and tears the fibers.
Common Questions
Which is better, porterhouse or T-bone?
If you’re feeding two people, porterhouse — the larger tenderloin is worth the price bump. For one person, a T-bone gives you the same two-muscle experience without leftovers. Neither is objectively better; they’re literally slices of the same primal cut.
How long does a porterhouse take to cook?
A 1.5-inch porterhouse in cast iron takes about 8–10 minutes total: 90 seconds per side to sear, then 3–4 minutes of basted finish, then 8–10 minutes of rest. Grilling with two zones runs closer to 12 minutes because the indirect finish is gentler.
Do I need to cook porterhouse to 145°F for safety?
The USDA recommends 145°F for whole cuts, but the risk on beef is surface bacteria — not internal. A hard sear pasteurizes the outside, which is where the pathogens live. Cooking to medium-rare (130–135°F final) is the industry norm for steakhouses for that reason.
Can I reverse sear a porterhouse or T-bone?
You can, but it’s less forgiving than on a tomahawk because the tenderloin overcooks quickly at low heat. If you want the reverse-sear method, use it on a thicker cut — our full reverse sear tomahawk guide covers the technique step by step.
What’s the best pan if I don’t have cast iron?
Carbon steel or a heavy-gauge stainless-clad skillet both work. Skip nonstick — the coating degrades above 500°F and won’t build the crust you need.
Serve It With
A porterhouse or T-bone is already the show. Keep sides light: a sharp arugula salad, blistered green beans, or a bowl of chimichurri for dipping. If you’ve got a smaller crowd and want a full spread, our grilled beef chuck makes a great second protein, and leftover strip slices go straight into a loaded steak sub the next day. On a budget week, swap in one of our top round steak recipes — still steakhouse-level flavor for a fraction of the price.
Did You Try Our Recipe ?
Chicken hears and gizzards
I would love you to send me the recipe please. I have no printer to print it off. [email protected]
Response from MeatRecipesBox
Hi Sharon, thank you so much for your kind words! I’ve just sent the full recipe to your inbox. Enjoy, and let me know how it turns out! 😊
Scrumptious
My husband (who is extremely picky) loved the liver & onions so much!! I didn’t have any beef broth or Sherry so I used about a tbl of Worcestershire and 1/4 c of white wine …..it was scrumptious
Response from MeatRecipesBox
Oh wow, I’m so happy to hear that!! 😍 I love that you made it work with what you had on hand — Worcestershire and white wine sound like a delicious twist. So glad your husband enjoyed it, especially being picky! Thank you for sharing your version, it makes me smile knowing it turned out scrumptious!
This was amazing
This recipe turned out really amazing! It’s juicy and spiced deliciously. I definitely would use less of the spicy pepper next time, but it really was delicious and I don’t think I’ll make chicken legs any other way from now on.!
Response from MeatRecipesBox
Thank you for taking the time to leave such a thoughtful review. I’m really glad to hear the recipe turned out juicy and full of flavor for you. That’s exactly what I was hoping for when putting it together. Good call on the spicy pepper as well. Adjusting the heat level to your own taste is always the best approach, and using a little less next time should make it just right for you. I really appreciate you trying the recipe and sharing your experience. It’s great to know it worked so well for you.
I Didn’t Expect This Cornbeef Hash Recipe to Taste This Good!!
One skillet. A handful of simple ingredients. Thirty minutes on the clock. And somehow… I ended up with the crispiest, most comforting cornbeef hash recipe I’ve made in years.
I wasn’t expecting much—just a quick, no-fuss meal. But that first bite? Crispy edges, tender potatoes, smoky corned beef, a little kick of pepper. It tasted like something straight off a cozy diner griddle.
Honestly, it caught me off guard—in the best way. Here’s why this simple skillet completely won me over.


