

Key Takeaways
- Cold-pan starts render fat 2× more evenly than hot-pan searing (Serious Eats, 2024).
- Pull duck at 130 °F; carry-over lifts it to a perfect 135 °F while resting (ThermoWorks, 2025).
- Pat the skin bone-dry — moisture is the #1 reason duck skin turns rubbery, not crisp.
- Score the fat, never the flesh: a 1/4-inch diamond grid drains fat and doubles crunch.
Why Cold Pan, Not Hot?
In 2026, the cold-pan method is the near-universal standard among French bistros and American test kitchens. A hot pan snaps the outer layer of fat before the interior can liquefy, trapping soft fat under leathery skin. Starting cold lets the fat cell walls collapse gradually — roughly 8–10 minutes on medium-low — so you finish with skin that shatters like glass and a breast that’s still gently warmed from below.
The Serious Eats duck-breast test compared four starting temperatures side by side and found cold-pan renders roughly 40% more fat while keeping the loin below 100 °F for the first six minutes — exactly the window you need to nail medium-rare.
Ingredients (Serves 2)
- 2 duck breasts, boneless, skin on (about 6–8 oz / 170–225 g each — Moulard, Muscovy, or Pekin all work)
- 1 tsp flaky sea salt (Maldon or kosher)
- 1/2 tsp freshly cracked black pepper
- 2 sprigs fresh thyme (optional)
- 1 clove garlic, lightly smashed (optional)
- 1 tbsp reserved rendered duck fat, for basting
Halal-friendly, dairy-free, gluten-free. Pair with a fruit-forward pan sauce like cherry-balsamic, orange-pomegranate, or a spoon of fig jam loosened with sherry vinegar.
How to Pan-Sear Duck Breast (Step-by-Step)
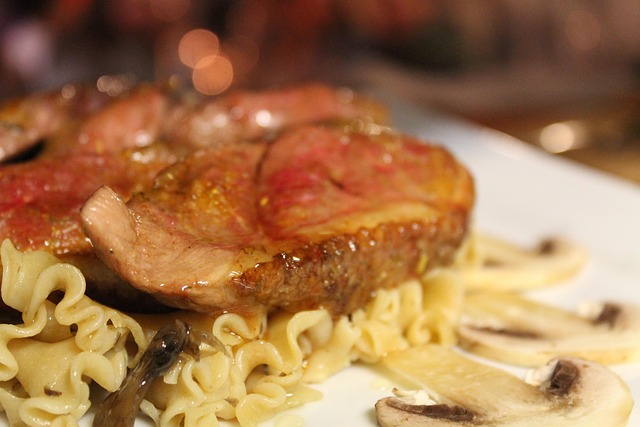
- Dry-brine. Pat the breasts completely dry, then sit them uncovered on a rack in the fridge for at least 1 hour (overnight is better). A parched surface is the single biggest predictor of crisp skin.
- Score the skin. With a sharp knife held at 45°, cut a diamond grid roughly 1/4-inch apart. Go through the fat but stop before the meat — nicking the flesh bleeds juices and dries out the breast.
- Season. Salt and pepper both sides. Rub the salt into the score lines so it seasons the fat as it renders.
- Cold-pan start. Place the breasts skin-side down in a dry, unheated cast-iron or heavy stainless skillet. Set over medium-low heat.
- Render, 8–10 minutes. Do not touch them. You’ll hear a steady, gentle sizzle. Fat will pool — spoon off any excess into a jar as it accumulates. The skin is ready to flip when it’s deep amber and lifts cleanly from the pan.
- Flip and finish, 3–4 minutes. Turn the breasts. Add thyme and garlic to the fat, tilt the pan, and baste twice. Pull at an internal reading of 130 °F (54 °C) for medium-rare.
- Rest 5–7 minutes. Set on a warm plate, skin-side up (never covered — steam kills the crunch). Carry-over will bring the center to 135 °F.
- Slice against the grain into 1/4-inch pieces. Fan across the plate, sprinkle finishing salt over the pink cross-section, and spoon sauce beside — never on top of — the skin.
What Internal Temperature Is Duck Breast Done?
Unlike whole poultry, duck breast is safe — and vastly better — served pink. USDA guidance for whole ducks calls for 165 °F, but restaurant-quality breast is pulled at 130 °F and rested to 135 °F, the range every serious cookbook and test kitchen aligns on.
An instant-read thermometer probed into the thickest part is non-negotiable. Duck breast climbs 4–6 °F during rest, so always pull 5 °F below your target. For a full doneness reference across cuts, see our meat doneness temperature guide.
Watch the Cold-Pan Method in Action
Common Mistakes That Ruin Crispy Skin

Starting in a hot pan
You’ll sear the fat before it can render. Skin turns leathery and a soft, greasy layer sits underneath. Start cold, every time.
Skipping the dry-brine
Damp skin steams. Even a 30-minute uncovered fridge rest changes the outcome — an overnight rest is a game of a different level.
Not scoring, or scoring too deep
Un-scored skin traps fat and shrinks into a taut dome. Scoring through the meat lets juices escape into the pan and dries the breast. Halt the blade the moment you feel resistance change.
Cranking the heat to speed things up
Medium-low is the whole trick. If you smell smoke or the sizzle turns aggressive, drop the burner — patience buys you a full 60% more crunch.
Slicing straight off the pan
Cut too early and the pink juice you worked for pours out onto the board. Five minutes of rest holds it inside the meat where it belongs.
Quick Pan Sauce (Optional, 4 Minutes)
Once the duck rests, pour off all but 1 teaspoon of fat. Return the pan to medium heat and add:
- 1 small shallot, finely diced
- 1/3 cup dry red wine, port, or pomegranate juice
- 1/2 cup chicken or duck stock
- 2 tbsp cherry preserves or fig jam
- 1 tsp balsamic or sherry vinegar
- 1 tbsp cold butter, finished off-heat (optional)
Reduce until it coats the back of a spoon (about 3 minutes). Taste, salt lightly, and spoon next to the sliced duck.
Frequently Asked Questions
Do you cook duck breast skin-side down first?
Yes — and it stays there for roughly 80% of the total cook. Skin-side down in a cold pan is what renders the fat, crisps the skin, and gently warms the breast from below. You only flip for the last 3–4 minutes to finish the flesh side.
Can duck breast be pink in the middle?
Absolutely. Duck breast is treated like beef, not chicken. Medium-rare (130 °F pulled, 135 °F rested) is the sweet spot. Anything past 145 °F turns the meat livery and dry.
Should I score the duck skin before cooking?
Yes. A shallow diamond grid drains fat efficiently, exposes more surface area to the pan, and keeps the skin from puckering into a dome. Cut through the fat only — never into the flesh.
Why is my duck skin not crispy?
Three culprits, in order: wet skin, a pan started too hot, and un-scored fat. Fix all three (pat dry, cold-pan start, diamond score) and you’ll get lacquered, glass-crisp skin every time.
Do I need to rest duck breast?
Yes — 5 to 7 minutes, uncovered, skin-side up. Resting lets muscle fibers reabsorb juice and gives carry-over cooking time to lift the center to 135 °F. Covering it steams the skin, so leave it open to the air.
Serve It With
- Duck-fat roasted potatoes — cooked in the fat you just rendered
- Wilted spinach with garlic and lemon
- Roasted beetroot with orange zest
- Cauliflower purée finished with a knob of butter
Once you master the cold-pan render, duck moves from restaurant occasion to a 25-minute weeknight upgrade. Score, sit it cold, be patient, pull at 130 °F — that’s the whole recipe. Try it once and the technique carries over to reverse-seared steak, seared salmon fillets, and any protein where crackling skin matters.
Did You Try Our Recipe ?
Scrumptious
My husband (who is extremely picky) loved the liver & onions so much!! I didn’t have any beef broth or Sherry so I used about a tbl of Worcestershire and 1/4 c of white wine …..it was scrumptious
Response from MeatRecipesBox
Oh wow, I’m so happy to hear that!! 😍 I love that you made it work with what you had on hand — Worcestershire and white wine sound like a delicious twist. So glad your husband enjoyed it, especially being picky! Thank you for sharing your version, it makes me smile knowing it turned out scrumptious!
This was amazing
This recipe turned out really amazing! It’s juicy and spiced deliciously. I definitely would use less of the spicy pepper next time, but it really was delicious and I don’t think I’ll make chicken legs any other way from now on.!
Response from MeatRecipesBox
Thank you for taking the time to leave such a thoughtful review. I’m really glad to hear the recipe turned out juicy and full of flavor for you. That’s exactly what I was hoping for when putting it together. Good call on the spicy pepper as well. Adjusting the heat level to your own taste is always the best approach, and using a little less next time should make it just right for you. I really appreciate you trying the recipe and sharing your experience. It’s great to know it worked so well for you.
I Didn’t Expect This Cornbeef Hash Recipe to Taste This Good!!
One skillet. A handful of simple ingredients. Thirty minutes on the clock. And somehow… I ended up with the crispiest, most comforting cornbeef hash recipe I’ve made in years.
I wasn’t expecting much—just a quick, no-fuss meal. But that first bite? Crispy edges, tender potatoes, smoky corned beef, a little kick of pepper. It tasted like something straight off a cozy diner griddle.
Honestly, it caught me off guard—in the best way. Here’s why this simple skillet completely won me over.


