Got salmon in the fridge and no clue what to do with it? I’ve been there. Whenever I need something fast, bold, and guaranteed to taste amazing, I make this salmon soy sauce recipe with a simple garlic glaze.
This recipe turns basic salmon into something glossy, savory, and seriously satisfying. It takes minimal effort, uses pantry staples, and delivers restaurant-level flavor without the restaurant bill. And honestly, who doesn’t want that?
Why Salmon with Soy Sauce Just Works
Salmon already tastes rich and buttery. Soy sauce adds salt, umami, and depth. Garlic brings punch and aroma.
When you combine those three elements, you create balance. You get sweetness from the fish, savoriness from the soy sauce, and bold flavor from garlic. Ever wondered why salmon with soy sauce shows up on so many menus? Because it never disappoints.
The Power of Umami
Soy sauce packs serious umami flavor. Umami enhances natural richness and makes every bite taste deeper. You don’t need fancy spices when soy sauce handles the heavy lifting.
- Enhances natural salmon flavor
- Adds depth without overpowering
- Pairs perfectly with garlic and citrus
Simple ingredients. Big results. That’s the goal.

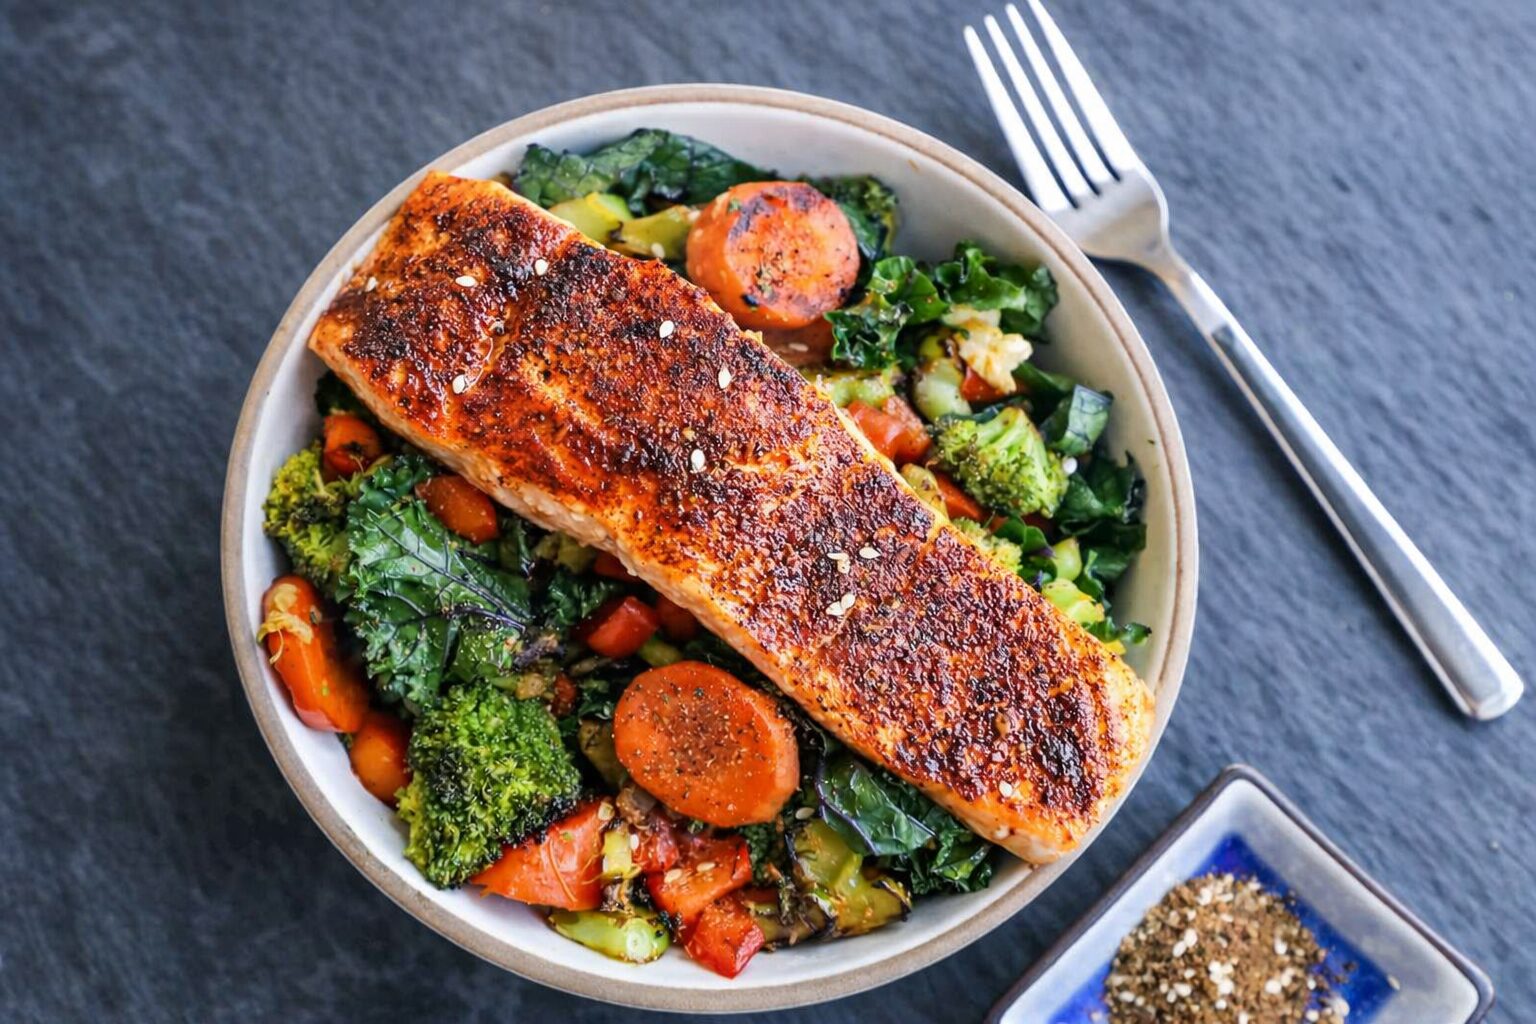
Best Salmon Soy Sauce Recipe (Step-by-Step)
This salmon soy sauce recipe – easy garlic glaze comes together in under 20 minutes. You likely have everything you need already.
Ingredients
- 4 salmon fillets (about 6 oz each)
- 3 tablespoons low-sodium soy sauce
- 1 tablespoon honey or brown sugar
- 3 cloves minced garlic
- 1 tablespoon fresh lemon juice
- 1 tablespoon olive oil
- ½ teaspoon black pepper
Instructions
- Preheat your oven to 400°F (200°C).
- Line a baking sheet with parchment paper.
- Whisk soy sauce, honey, garlic, lemon juice, and olive oil in a bowl.
- Pat salmon dry and place skin-side down on the sheet.
- Brush half the glaze over the salmon.
- Bake for 12–15 minutes.
- Brush remaining glaze during the final 3 minutes.
The glaze thickens slightly and creates a shiny coating. The garlic turns fragrant. The salmon flakes easily with a fork. That’s your green light.
How to Get That Perfect Garlic Glaze
Want sticky, flavorful salmon instead of watery fish? Pay attention to a few small details.
Pat the Salmon Dry
Moisture blocks caramelization. I always pat my salmon dry before adding glaze. That simple move changes the final texture completely.
Use Fresh Garlic
Fresh garlic beats jarred garlic every time. Fresh cloves give sharper, brighter flavor. Trust me, you taste the difference.
Layer the Glaze
Brush some glaze at the beginning. Add more near the end. This layering builds flavor and prevents burning.
Ever burned garlic glaze because you added it too early? I have. It tastes bitter, and nobody wants that.

Baking vs Pan-Searing: Which Wins?
You can cook salmon with soy sauce in different ways. Each method gives slightly different results.
- Baking: Even cooking and minimal effort.
- Pan-Searing: Crispy edges and faster cook time.
- Grilling: Smoky flavor and charred glaze.
I prefer baking for consistency. I choose pan-searing when I want crispy skin. IMO, baking works best for beginners because it removes guesswork.
Flavor Variations to Try
This salmon soy sauce recipe adapts easily. You can tweak flavors without complicating things.
Spicy Garlic Soy Salmon
Add chili flakes or a teaspoon of sriracha. The heat balances the sweetness perfectly. Love bold flavors? This version delivers.
Ginger Garlic Soy Salmon
Add one teaspoon of grated fresh ginger. Ginger brightens the glaze and adds warmth.
Maple Soy Garlic Glaze
Swap honey for maple syrup. Maple adds deeper sweetness and slight smokiness.
Small adjustments create new flavor profiles. Why cook the same thing every week?
What to Serve with Salmon with Soy Sauce
This dish pairs well with simple sides. You want balance, not competition.
- Steamed jasmine rice
- Roasted broccoli
- Garlic green beans
- Stir-fried vegetables
- Cucumber salad
I usually spoon extra glaze over rice. The rice absorbs every drop. Zero waste, maximum flavor.
Common Mistakes to Avoid
Let’s keep things smooth.
- Overcooking the salmon: Remove it when the center looks slightly translucent.
- Using too much soy sauce: Balance matters.
- Skipping lemon juice: Acid keeps the glaze bright.
- Cooking straight from the fridge: Let salmon sit at room temperature for 15 minutes.
Ever cut into dry salmon and instantly regret your life choices? Watch your timing and avoid that moment.

Meal Prep and Storage Tips
This salmon soy sauce recipe – easy garlic glaze works great for meal prep. You can cook extra fillets and store them easily.
Store leftovers in an airtight container for up to three days. Reheat gently at 300°F to prevent drying out. FYI, the microwave works in emergencies, but the texture changes slightly.
You can also prepare the garlic soy glaze ahead of time. Keep it in the fridge for up to three days and whisk before using.
Why This Recipe Beats Takeout
This salmon with soy sauce gives you bold flavor without hidden ingredients. You control salt, sweetness, and quality.
Fresh salmon tastes cleaner than most takeout options. You also skip delivery fees and long wait times.
Plus, cooking this dish feels satisfying. You brush on the glaze, smell the garlic, and watch it caramelize in the oven. Simple pleasures matter.
Frequently Asked Questions
Can I use frozen salmon?
Yes. Thaw it completely and pat it dry before adding glaze.
Can I make this in an air fryer?
Yes. Cook at 390°F for 8–10 minutes. Add glaze during the final minutes.
Can I skip the sweetener?
You can, but the glaze won’t caramelize as well. A small amount of honey or sugar improves texture and flavor.
Final Thoughts on This Salmon Soy Sauce Recipe
This salmon soy sauce recipe delivers bold flavor, simple prep, and reliable results. Garlic adds punch. Soy sauce adds depth. A touch of sweetness balances everything.
You don’t need complicated techniques. You just need quality salmon and the right ratio of ingredients.
So next time you want something easy but impressive, try this salmon with soy sauce. Brush, bake, enjoy. Dinner just got a serious upgrade.
Did You Try Our Recipe ?
Scrumptious
My husband (who is extremely picky) loved the liver & onions so much!! I didn’t have any beef broth or Sherry so I used about a tbl of Worcestershire and 1/4 c of white wine …..it was scrumptious
Response from MeatRecipesBox
Oh wow, I’m so happy to hear that!! 😍 I love that you made it work with what you had on hand — Worcestershire and white wine sound like a delicious twist. So glad your husband enjoyed it, especially being picky! Thank you for sharing your version, it makes me smile knowing it turned out scrumptious!
This was amazing
This recipe turned out really amazing! It’s juicy and spiced deliciously. I definitely would use less of the spicy pepper next time, but it really was delicious and I don’t think I’ll make chicken legs any other way from now on.!
Response from MeatRecipesBox
Thank you for taking the time to leave such a thoughtful review. I’m really glad to hear the recipe turned out juicy and full of flavor for you. That’s exactly what I was hoping for when putting it together. Good call on the spicy pepper as well. Adjusting the heat level to your own taste is always the best approach, and using a little less next time should make it just right for you. I really appreciate you trying the recipe and sharing your experience. It’s great to know it worked so well for you.
I Didn’t Expect This Cornbeef Hash Recipe to Taste This Good!!
One skillet. A handful of simple ingredients. Thirty minutes on the clock. And somehow… I ended up with the crispiest, most comforting cornbeef hash recipe I’ve made in years.
I wasn’t expecting much—just a quick, no-fuss meal. But that first bite? Crispy edges, tender potatoes, smoky corned beef, a little kick of pepper. It tasted like something straight off a cozy diner griddle.
Honestly, it caught me off guard—in the best way. Here’s why this simple skillet completely won me over.

Emma Delacourt
Recipe Developer & Founder, MeatRecipesBox
Emma has been developing and testing meat recipes since 2019. She focuses on temperature precision, food science, and making restaurant-quality results accessible for home cooks. Every recipe on this site is tested multiple times before publishing.