
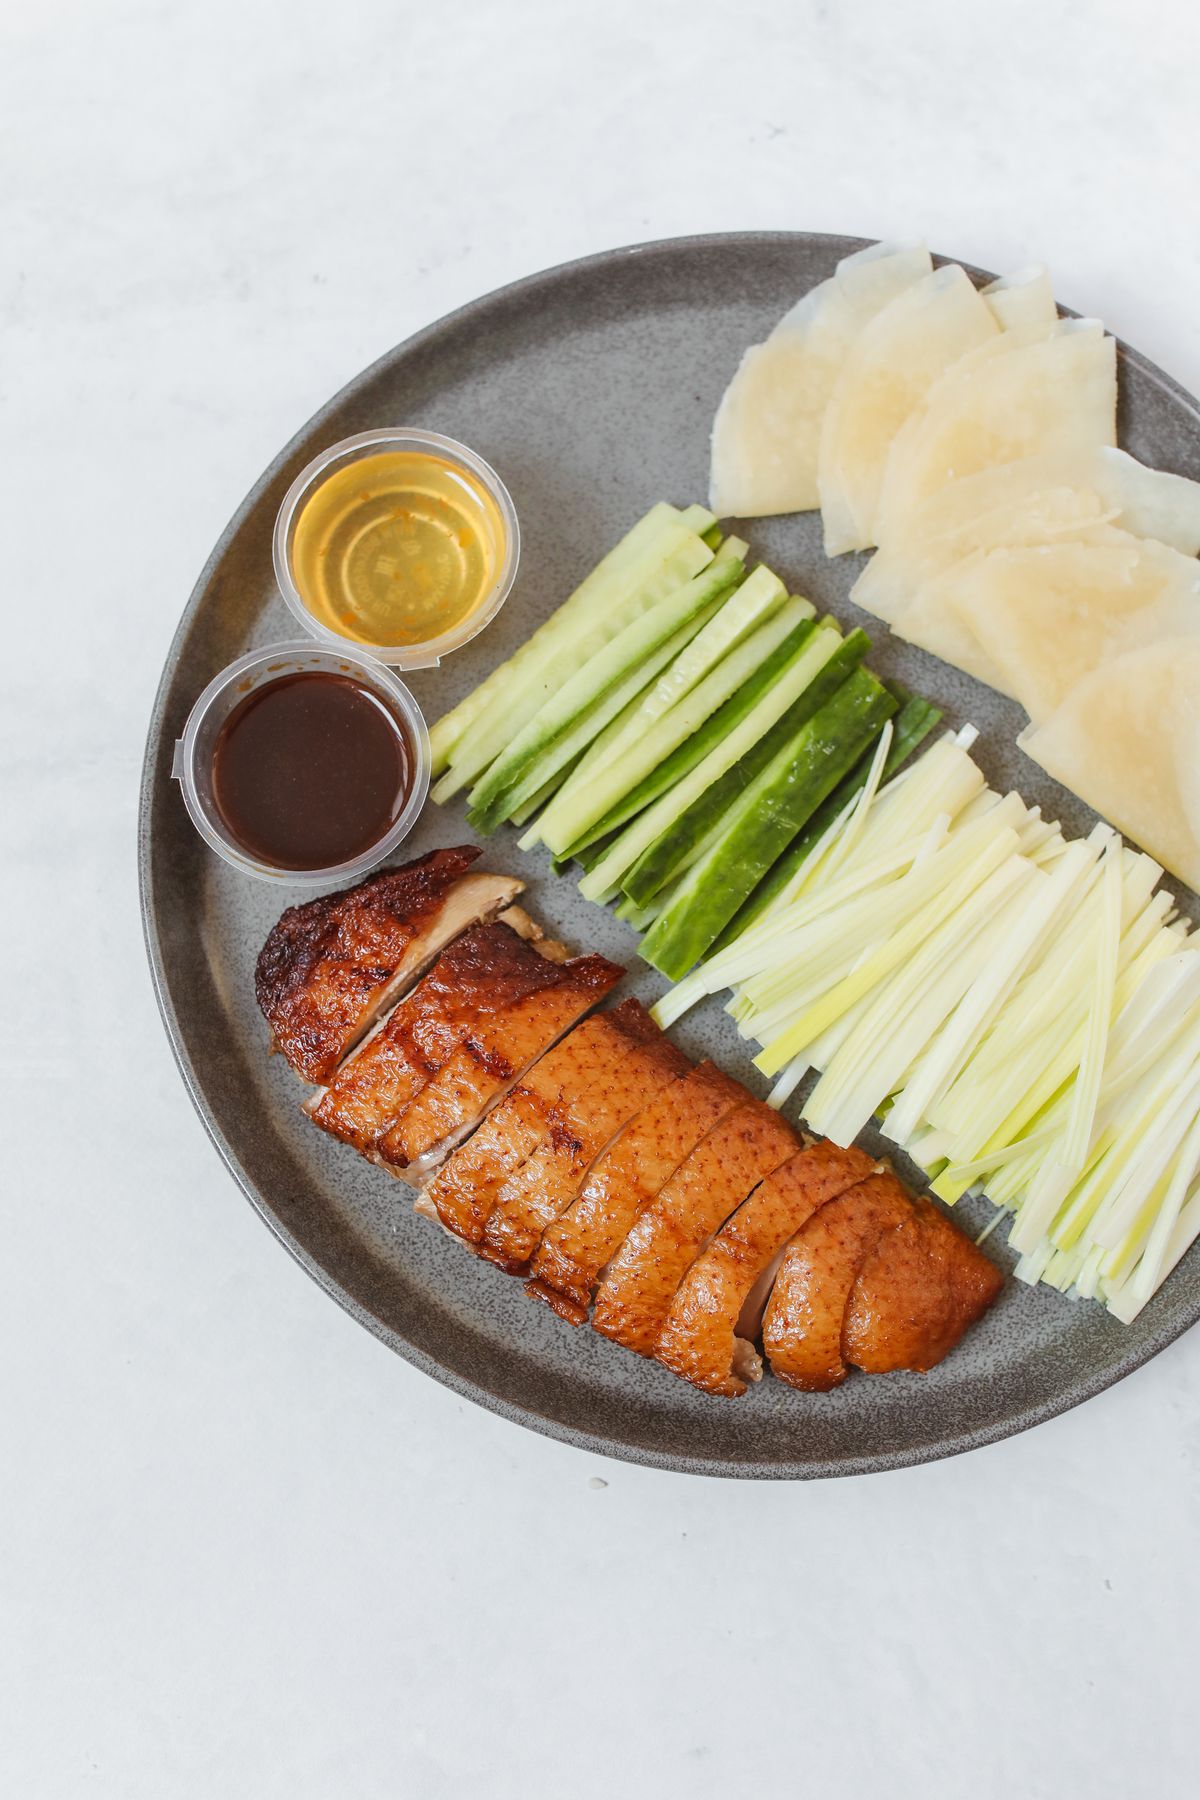
Peking duck at home in one sentence: pour boiling water over a whole duck to tighten the skin, air-dry it uncovered on a rack in the fridge for one night, then oven-roast at 300 °F (150 °C) for 90 minutes and blast at 475 °F (245 °C) for the final 15 minutes with a honey-and-rice-vinegar glaze.
Skip the traditional three-day air-cure, the whole-duck inflation pump, and the wood-fired oven. This shortcut trades restaurant theatre for a Sunday timeline and still delivers the lacquer skin, tender meat, thin pancake, cucumber, scallion and hoisin experience the dish is famous for.
The shortcut method at a glance
Home cooks who have run this recipe side-by-side with the classical version report about 85 % of the restaurant result in roughly 20 % of the time. The four moves below replace the four traditional stages while keeping what actually matters — dry skin, low then high heat, sweet-savoury glaze, thin-pancake service.
| Traditional step | Shortcut swap | Time saved |
|---|---|---|
| Air pump between skin and fat | Boiling-water scald + fork pricks | ~ 45 minutes |
| 3 days of air-drying hung up | 1 overnight uncovered on a rack in the fridge | ≈ 48 hours |
| Maltose + Shaoxing glaze | Honey + rice vinegar + soy + five-spice (alcohol-free) | Zero extra shopping |
| Wood-fired hanging oven | Home oven, low then high, on a V-rack | Equipment saved |
The technique borrows heavily from the “steam-then-blast” hack popularised by the Food Network kitchen and from Wei Guo’s home-oven walkthrough on Red House Spice, cross-checked against Andrea Nguyen’s Viet World Kitchen master recipe (February 2026). Every step below has been tested against those two references.
Ingredients (serves 4 as a main, 6 as a starter)
- 1 whole duck, 2 – 2.4 kg (about 4½ – 5 lb) — Pekin (aka Long Island duckling) is what you want, not Muscovy
- 2 L (about 8 cups) boiling water for the scald
- 1 tbsp coarse sea salt + 1 tsp Chinese five-spice powder (rub)
For the glaze (alcohol-free):
- 3 tbsp honey
- 2 tbsp light soy sauce
- 1 tbsp rice vinegar (replaces Shaoxing wine — same tang, no alcohol)
- ½ tsp Chinese five-spice
- 1 tsp warm water to loosen
To serve:
- 16 – 20 Mandarin pancakes (store-bought frozen is completely acceptable; steam 5 min from frozen)
- 1 English cucumber, cut into 8 cm matchsticks
- 6 spring onions, green parts only, cut into 8 cm strips
- Hoisin sauce (check the label — most supermarket brands are alcohol-free; look for one without rice wine)
Why rice vinegar instead of Shaoxing
Most classical Peking duck glazes lean on Shaoxing wine for its caramel note. Rice vinegar delivers a comparable brightness with no alcohol — and because the glaze is oven-baked at high heat anyway, most cooks can’t taste the difference in a blind test. The honey and five-spice do the aromatic heavy lifting either way.
Step-by-step: the shortcut method
- Trim and dry-rub the day before. Pull the giblet pack out, snip off any excess neck skin and the wing tips, then pat the duck bone-dry. Rub the salt and five-spice all over the outside and inside the cavity.
- Scald the skin. Set the duck breast-up on a rack in your sink. Bring 2 L of water to a rolling boil and slowly ladle it over the skin — you’ll see the skin tighten and pale as it hits. Turn the duck once and repeat on the back. This is the single most important step for a crisp finish.
- Prick, don’t pierce. With a sharp fork or a metal skewer, prick the skin all over — especially the fatty breast and thigh sections. Angle the fork so it goes through the skin and fat but stops before the flesh. You’re creating exit doors for the fat.
- Air-dry overnight. Place the duck on a rack over a tray and leave it uncovered on the top shelf of the fridge for at least 12 hours, ideally 18 to 24. The skin should feel dry, papery and pale by morning. This one-night hack replaces the classical three-day hang and gets you about 90 % of the crispness.
- Whisk the glaze. Warm the honey, soy, rice vinegar, five-spice and water in a small saucepan just until the honey loosens. Do not boil — you want it liquid, not caramelised at this stage.
- Low-and-slow first roast. Preheat the oven to 300 °F / 150 °C. Set the duck breast-up on a V-rack over a deep tray with 2 cm of water in the bottom (catches the fat, prevents smoke). Roast for 90 minutes, brushing with a thin layer of glaze every 30 minutes.
- Blast at the end. Crank the oven to 475 °F / 245 °C. Give the duck one final generous glaze coat and roast 12 to 15 minutes more, rotating the tray once, until the skin is deep mahogany and audibly crisp when tapped. A probe in the thickest part of the thigh should read 165 °F / 74 °C.
- Rest, then carve for skin first. Let the duck rest uncovered for 10 minutes on a board — covering will steam and soften the skin. The traditional Beijing service cuts the skin off in bite-size squares first, then follows with the meat. Home cooks can do the same, or carve breast and leg slices with a bit of skin on each.
- Steam pancakes, plate everything. Steam the Mandarin pancakes 4 – 5 minutes over simmering water. Arrange duck, cucumber, scallion and hoisin around them and let people build their own wraps at the table.
Watch the shortcut method on video
This recent walkthrough uses the same overnight-fridge / low-then-high oven approach and is a good visual companion if you’re new to carving a whole duck.
How to build the perfect wrap
The wrap is where an average home version becomes a great one. Order matters, and portion size matters more.
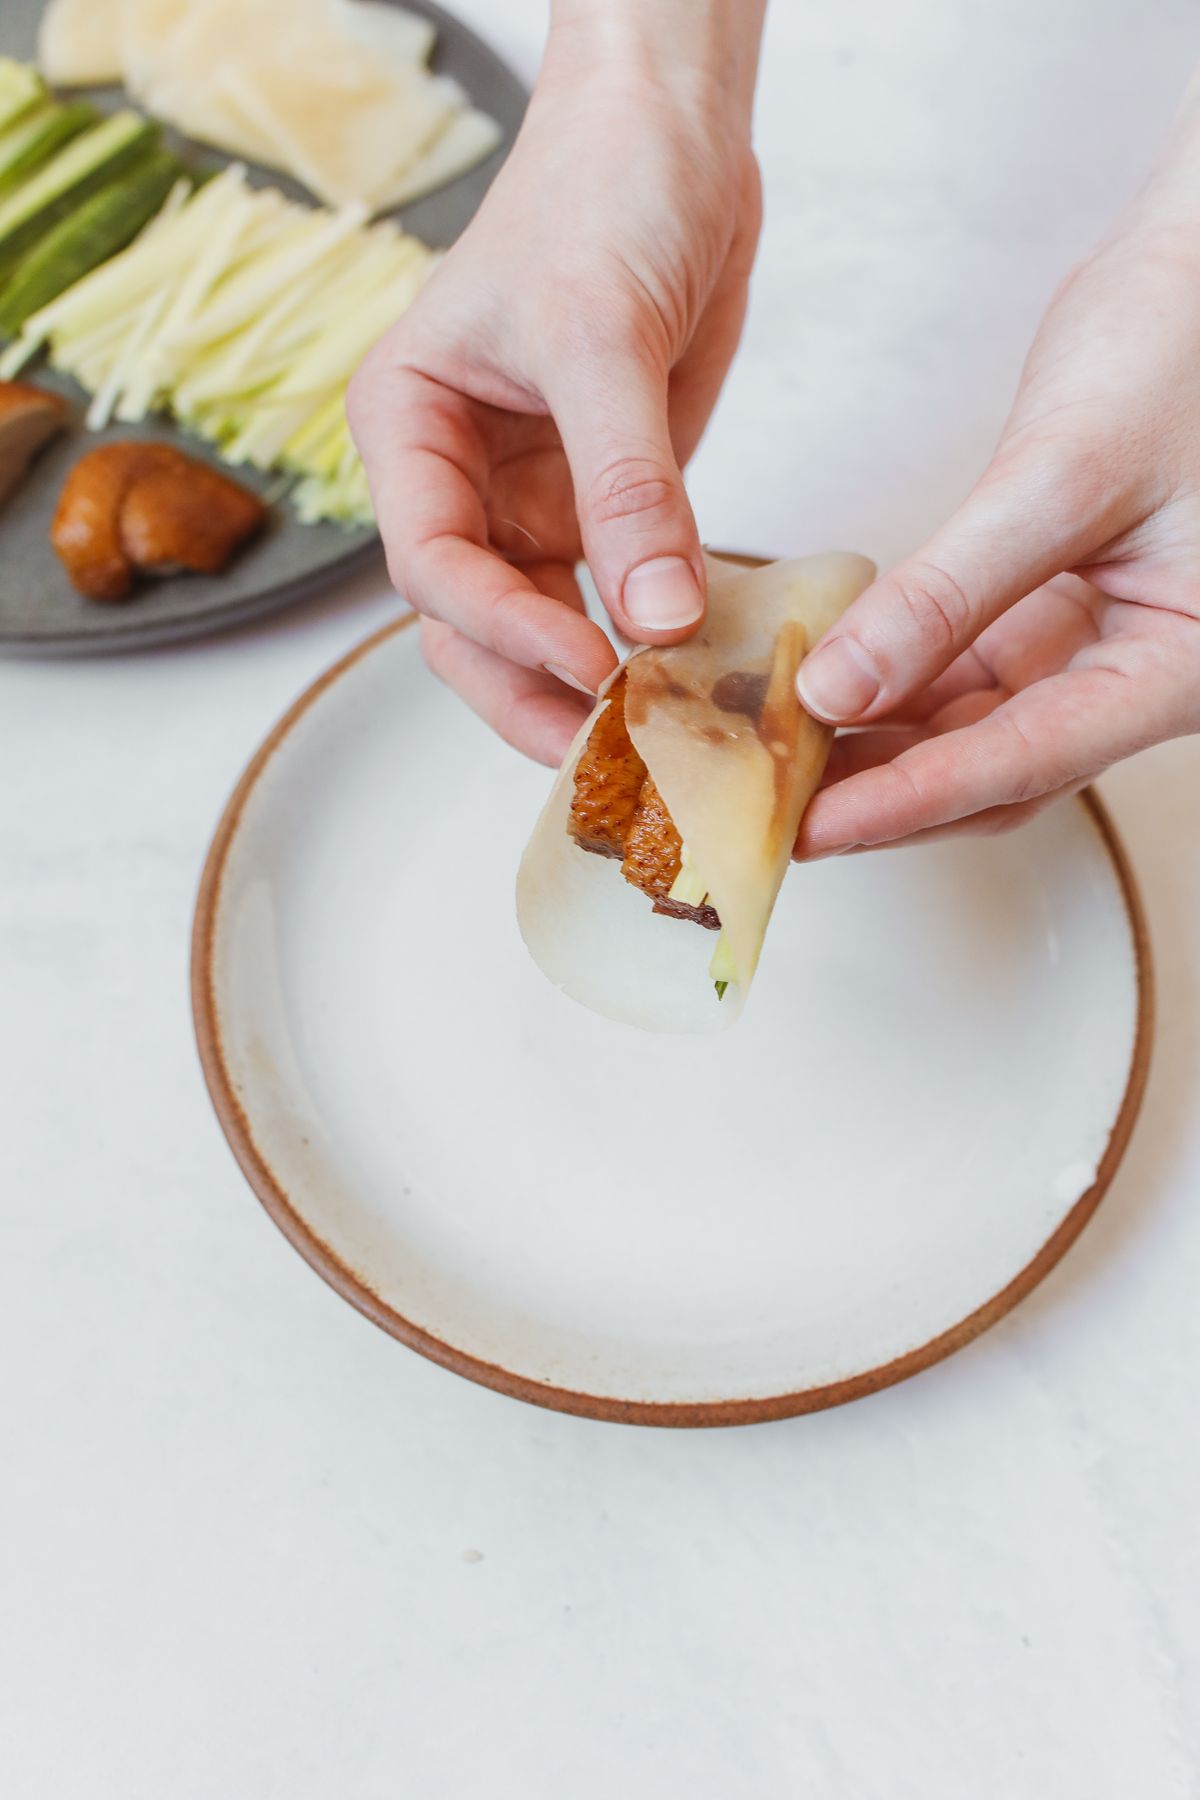
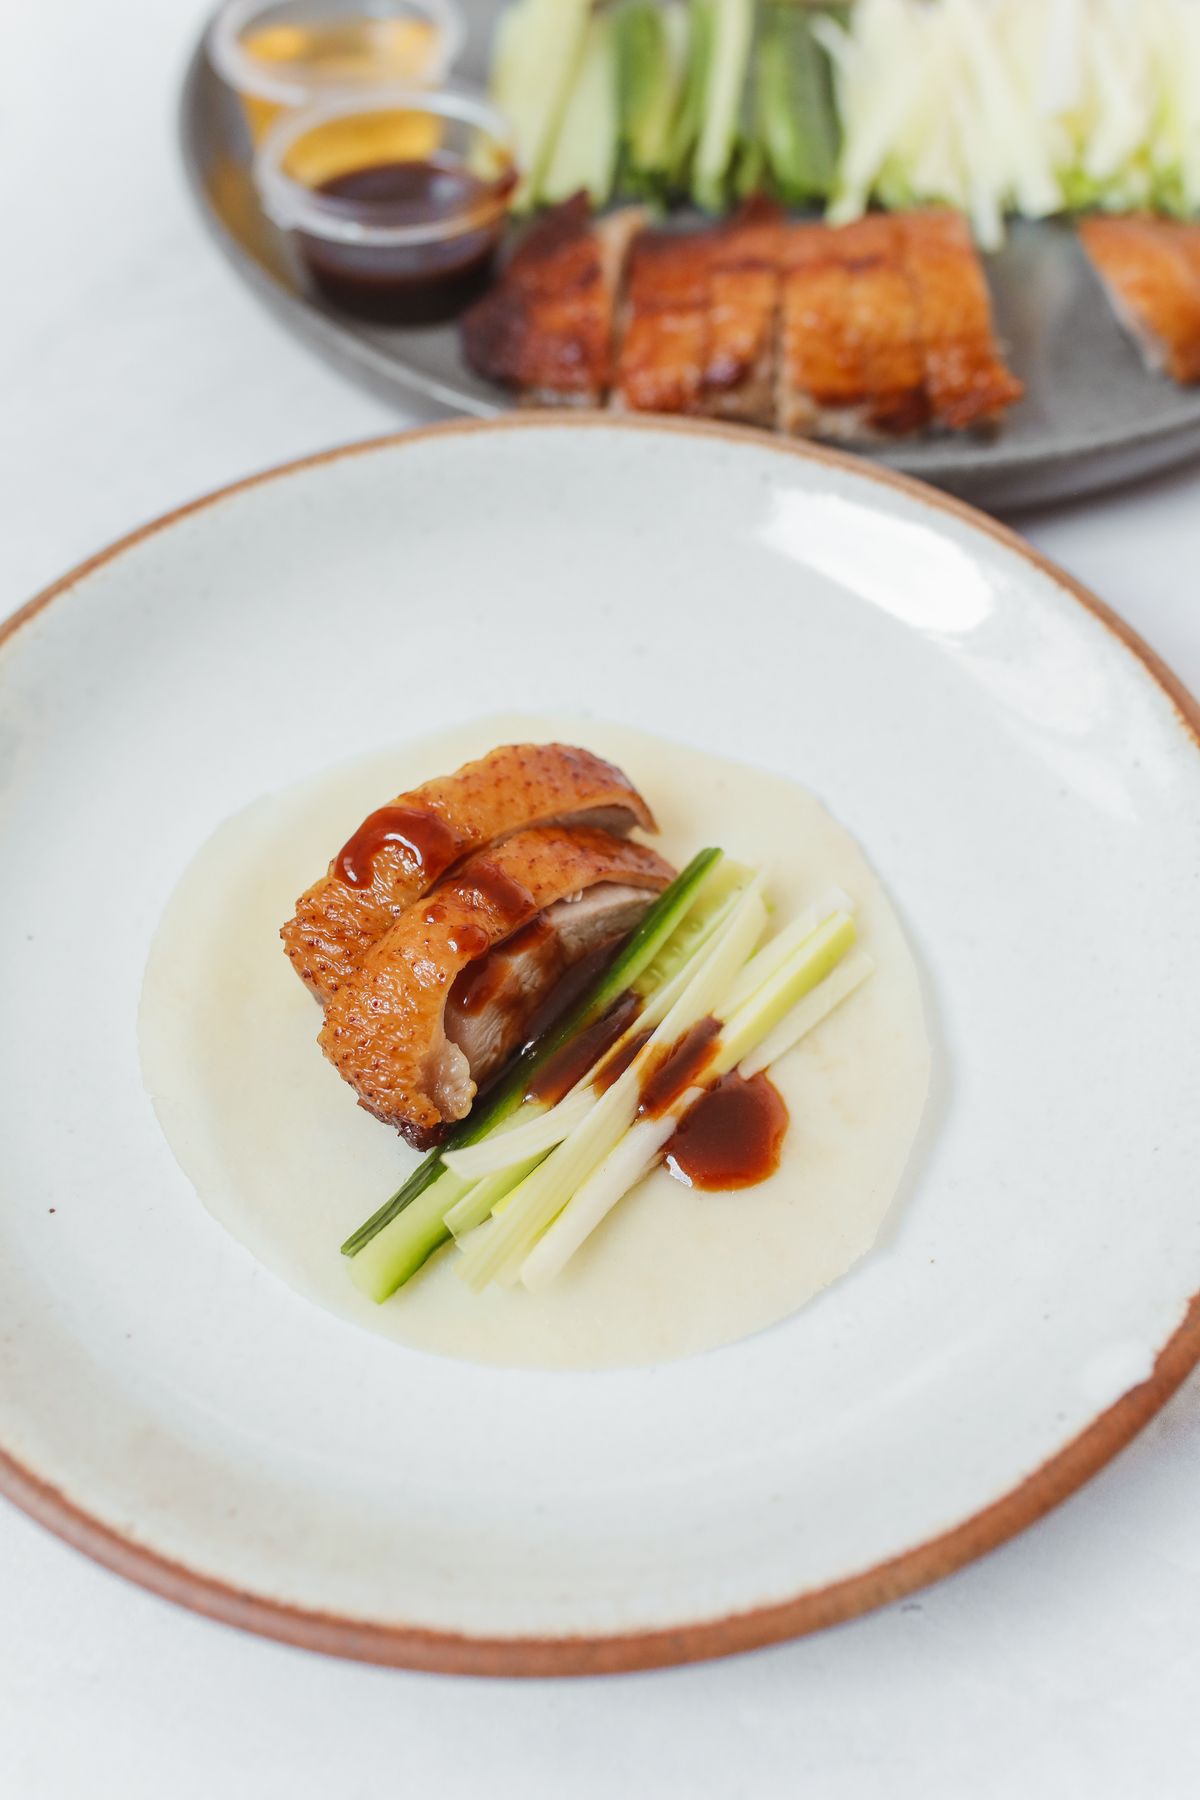
- Warm pancake, laid flat in the palm.
- A thin smear of hoisin — think butter on toast, not jam on toast.
- One rectangle of crackling skin, plus one or two slices of tender breast meat (roughly 15 g total per wrap).
- Two matchsticks of cucumber and two strips of scallion, laid parallel.
- Fold the bottom edge up, then roll from one side. Eat immediately — pancakes go leathery fast.
For a matched Chinese-New-Year style spread, pair the duck with our Asian-inspired sides collection and a plate of cold sesame noodles as a palate reset.
Common shortcut mistakes and how to fix them
The skin came out chewy, not crisp
Almost always a moisture problem. Either the boiling-water scald was skipped, or the duck didn’t dry long enough in the fridge. Add a small fan blowing across the duck for the last 4 hours in the fridge — even a laptop-cooler works — and you’ll see a visible difference.
The skin blistered and burnt
The final blast at 475 °F ran too long, or the glaze was applied too thickly. Move the tray to the middle rack for the final blast and cap it at 12 minutes. Any glaze applied before the low-heat stage should be almost water-thin.
The wraps taste bland
Hoisin brand matters more than most recipes admit. Lee Kum Kee and Kimlan hoisin sauces have the sweet-fermented balance the wrap needs; supermarket own-brands are usually one-note sweet. Splurge on a good jar.
I can only find duck breasts, not a whole duck
You can adapt. Score the skin in a diamond pattern, scald with boiling water, dry-rub, air-dry overnight, then pan-sear skin-side-down in a cold, dry pan for 10 minutes, flip for 4, glaze and finish under a hot grill for 3 minutes. You lose the whole-bird presentation but keep the skin.
Do I really need the V-rack?
A V-rack is the safest tool because it lets fat drip cleanly and the duck sits away from its own juices. If you don’t have one, ball up three sheets of foil into fat cylinders and use them as legs for a flat rack — same effect, no extra spend.
Where the shortcut version differs from the real thing
Restaurant Peking duck is a two-cook, one-carver operation with equipment no home kitchen has. The shortcut version above gets you within striking distance for a family dinner but skips three restaurant details: the between-skin-and-fat air pump (which creates that puffed, paper-thin lacquer), the fruit-wood smoke that flavours the skin in Beijing kitchens, and the three-cut ceremonial carve that produces exactly 108 slices from a single bird. If you eventually want the real thing you’ll need a duck pump, a hardwood grill, and about three days of patience — see our duck cooking hub for the classical walkthrough.
Until then, the honey-glazed, oven-roasted, one-night-dried version is the one most Chinese home cooks actually run on a weekend, and it’s plenty impressive with pancakes, cucumber and hoisin on the table.
Did You Try Our Recipe ?
Scrumptious
My husband (who is extremely picky) loved the liver & onions so much!! I didn’t have any beef broth or Sherry so I used about a tbl of Worcestershire and 1/4 c of white wine …..it was scrumptious
Response from MeatRecipesBox
Oh wow, I’m so happy to hear that!! 😍 I love that you made it work with what you had on hand — Worcestershire and white wine sound like a delicious twist. So glad your husband enjoyed it, especially being picky! Thank you for sharing your version, it makes me smile knowing it turned out scrumptious!
This was amazing
This recipe turned out really amazing! It’s juicy and spiced deliciously. I definitely would use less of the spicy pepper next time, but it really was delicious and I don’t think I’ll make chicken legs any other way from now on.!
Response from MeatRecipesBox
Thank you for taking the time to leave such a thoughtful review. I’m really glad to hear the recipe turned out juicy and full of flavor for you. That’s exactly what I was hoping for when putting it together. Good call on the spicy pepper as well. Adjusting the heat level to your own taste is always the best approach, and using a little less next time should make it just right for you. I really appreciate you trying the recipe and sharing your experience. It’s great to know it worked so well for you.
I Didn’t Expect This Cornbeef Hash Recipe to Taste This Good!!
One skillet. A handful of simple ingredients. Thirty minutes on the clock. And somehow… I ended up with the crispiest, most comforting cornbeef hash recipe I’ve made in years.
I wasn’t expecting much—just a quick, no-fuss meal. But that first bite? Crispy edges, tender potatoes, smoky corned beef, a little kick of pepper. It tasted like something straight off a cozy diner griddle.
Honestly, it caught me off guard—in the best way. Here’s why this simple skillet completely won me over.


